
Creating GIFs in Photoshop: A Step by Step Guide
Ahh, GIFs. And just to bury the hatchet early, they’re pronounced ‘jif(s)!’ Anyone with a computer can get ahold of Graphics Interchange Format files. Did you know that you can easily create GIFs using Photoshop? Many people enjoy seeing GIFs on their social media timelines. So, take advantage of this when it comes to marketing!
According to the University of Minnesota, it can process images 60,000 times as fast as processing text. Furthermore, 90% of the information processed by the brain is visual.
There’s no denying that humans are visual creatures. As a result, social media is one of the most utilized digital marketing today. Timelines are teeming with information about big brands, SMEs, and even startups. So how do you set yourself apart from everyone else? Well, you use a GIF on your marketing posts.
Why use GIFs for Social Media Marketing?
A picture paints a thousand words—what happens if you combine that with GIFs? They aren’t just for horsing around with friends on the ‘Net. GIFs have other purposes—namely for digital marketing! Here are the reasons why:
- Though a GIF doesn’t have any audio, it certainly has more content than a picture.
- GIFs have smaller file sizes than videos; this solves the problems of low bandwidth and mobile inaccessibility!
- Since it’s also soundless, you don’t catch anyone off-guard with a sudden spike in volume. GIFs aren’t so in-your-face, so they have less chance of scaring potential customers away.
- Additionally, a lot less work goes into a GIF than a video! You don’t have to spend a lot of time scripting and filming for a GIF.
- GIFs can quickly educate or entertain your audience. The files have a pretty short runtime, but you can still share a good amount of information!
- GIFs can convey feelings or moods with just moving images—use moods you want your customers to associate with your business, such as euphoria, relief, relaxation, etc.
- Also, GIFs can loop forever! Videos sometimes need to be set to loop on YouTube from a drop-down menu, but GIFs can play infinitely or for several loops before it stops.
How do you create animated GIFs in Photoshop?
The most popular content on the internet is visual media. Optimind found that “[a]rticles with images get 94% more views than those without.” Twitter says that posts with images “average a 35% boost in Retweets.” Likewise, video on social media “generates 1200% more shares than text and image content combined.” Don’t go overboard with the pictures, though! You’ll want to avoid having your posts or site pages load at the same pace as a snail.
GIFs aren’t so hard to make. Likewise, this’ll be an easy guide. Read on for instructions on how to use Adobe’s most famous editing software!

Step 1: Prepare your Photoshop document (…and other important files).
Yes, yes, this is probably the most basic first step, but it isn’t quite that simple! Yes, you have to state the file’s dimensions and resolution and whatnots. But, take care that your photos (or video) all fit within the confines of your document. If you’re not careful, then the whole document will be a huge bust! Also, all those big-sized pictures mixed in with the right-sized ones will doom your GIF to lousy quality.
Some extra tips: Don’t forget to use pixels! Also, keep in mind to keep resolutions low if you don’t want your gifs to result in a large file size. Lastly, make sure your color mode is RGB. Now you can open up that .PSD file with purpose!
Step 2: Load up the images you want to turn into a GIF.

If your images are in the desired order, you’ll want to click File > Scripts > Load Files Into Stack.
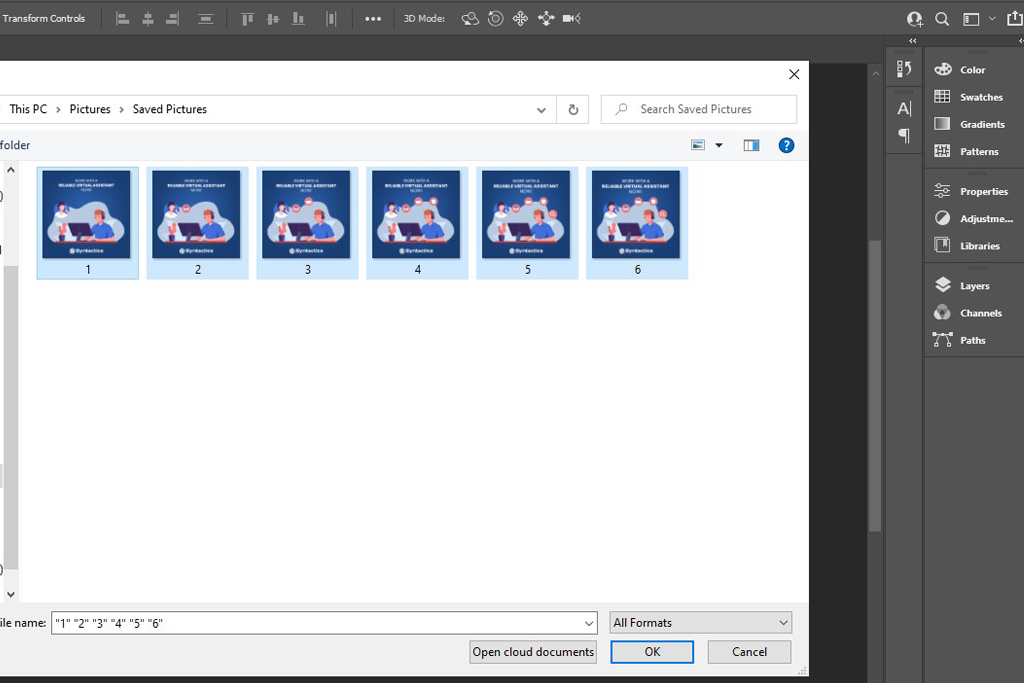
Next, click Browse and select the files you’re going to use in your animated GIF.
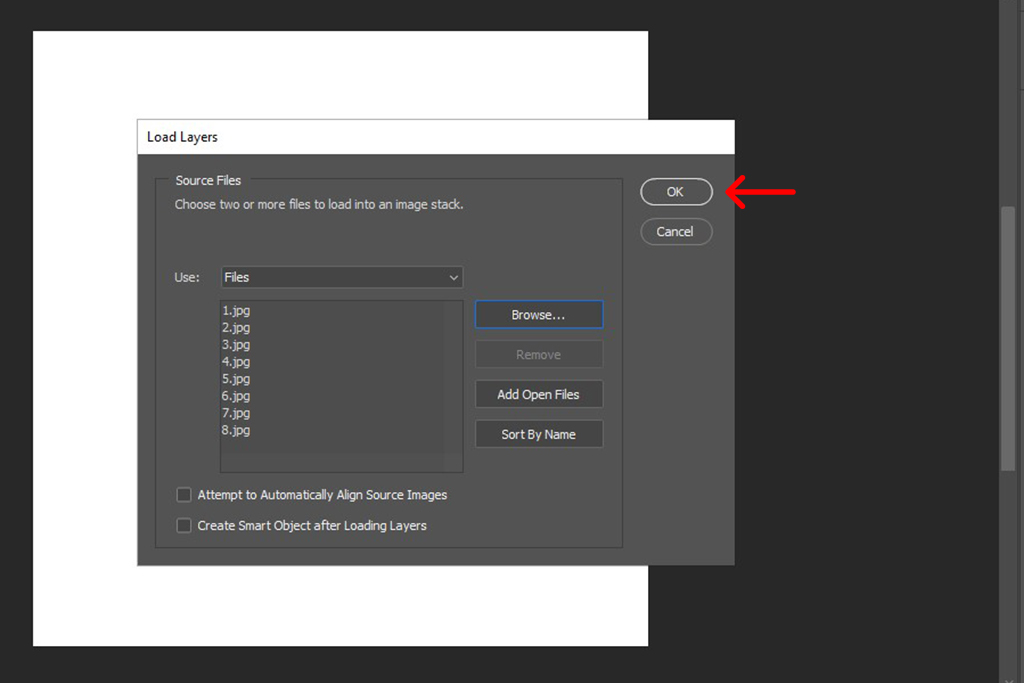
When done, click OK. Photoshop’s going to have a different layer for every image you picked.

If you haven’t arranged your images, then have one layer for each frame of your GIF. To add a new layer, just go Layer > New > Layer.
Step 3: Open your Timeline window.

When you start up Photoshop, it’s not open by default, so go to the navigation bar and Select Window > Timeline.
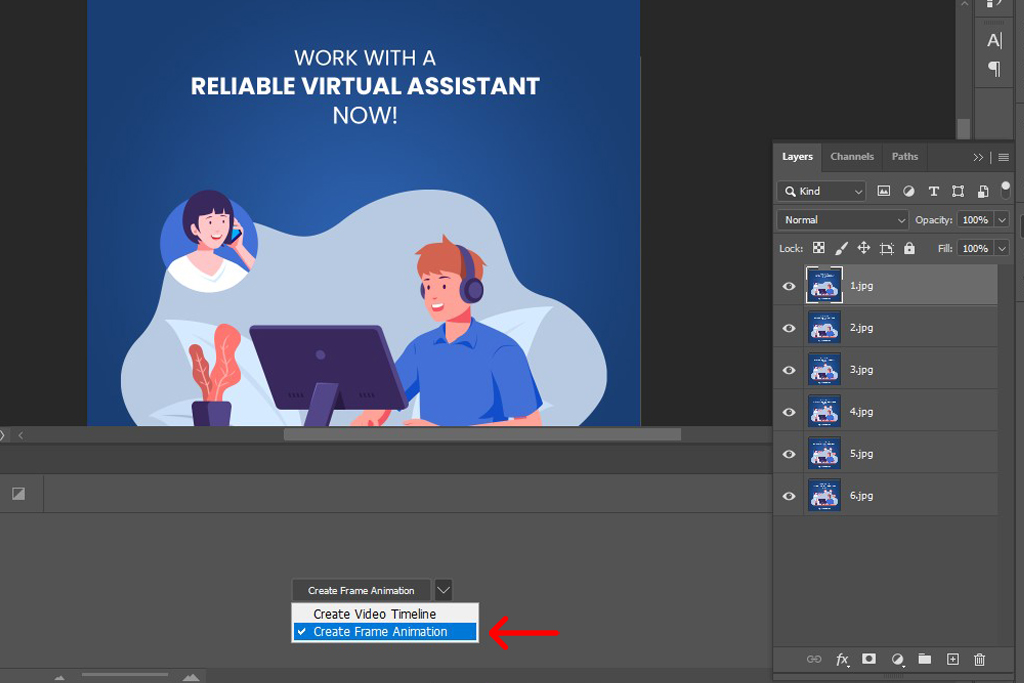
Once the window’s open, you’ll have the ability to create keyframes. Make sure the default—or ticked—option is Create Frame Animation. Click it, and on the Timeline window, you’ll see the frame animation options. There should now be at least one file in the Timeline.
Step 4: Name your layers.
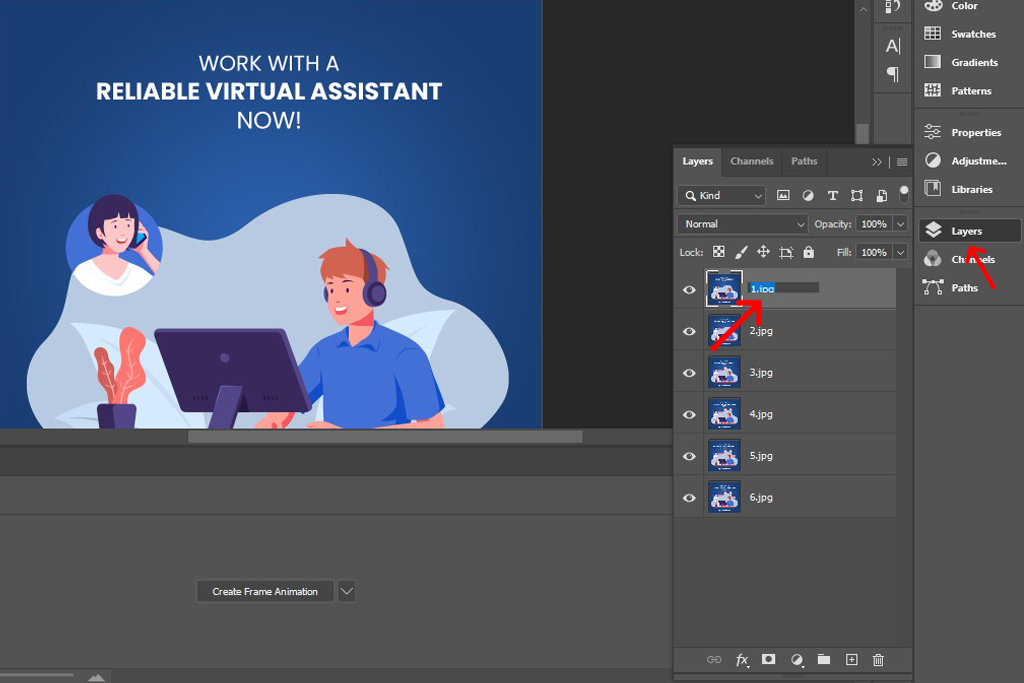
To better keep track of your layers, why not name them? You can do this by clicking the Layer panel (usually found on the bottom right), double-clicking on the corresponding thumbnail and then renaming it as you like. Don’t forget to hit Enter once done!
Step 5: Make Frames From Layers.
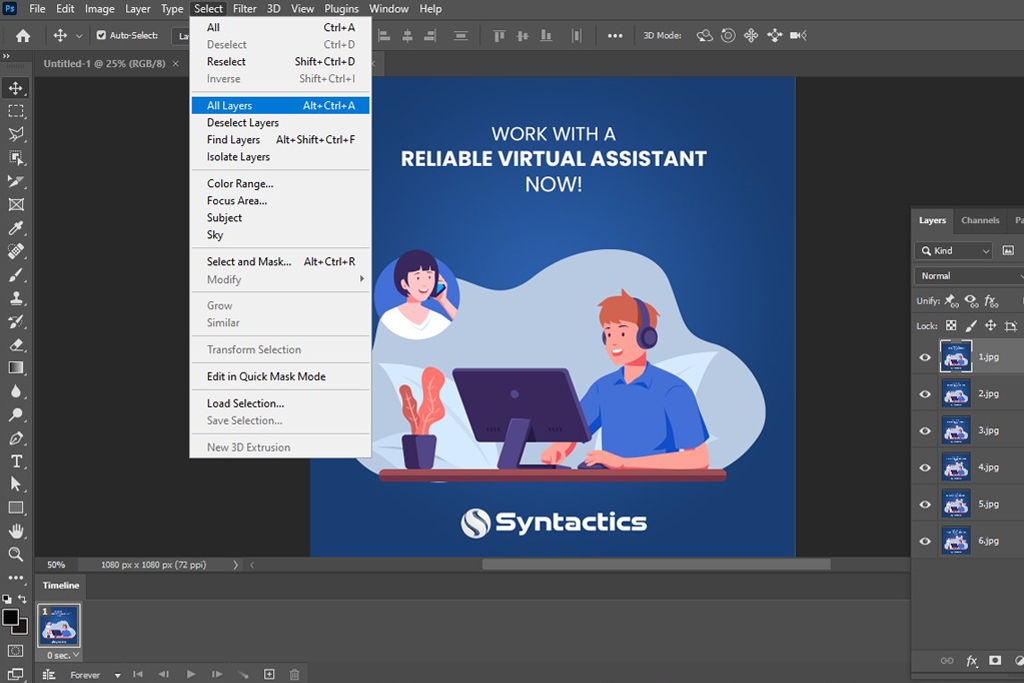
In this step, you must make a new frame for each layer if you haven’t already. If you haven’t, go to the navigation bar, then click Select > All Layers.
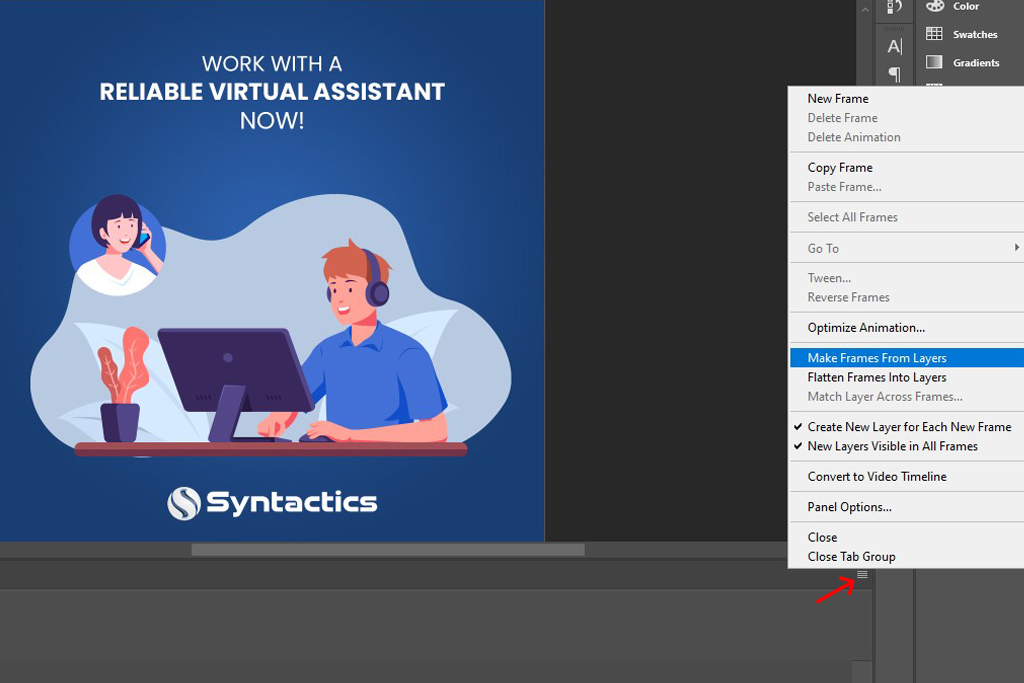
After that, click the little menu on the top right side of the Timeline window. A drop-down menu will appear, and you have to click Make frames from layers.
Step 6: Set up time delays.
In the Timeline window, beneath every thumbnail, you can see a time duration.
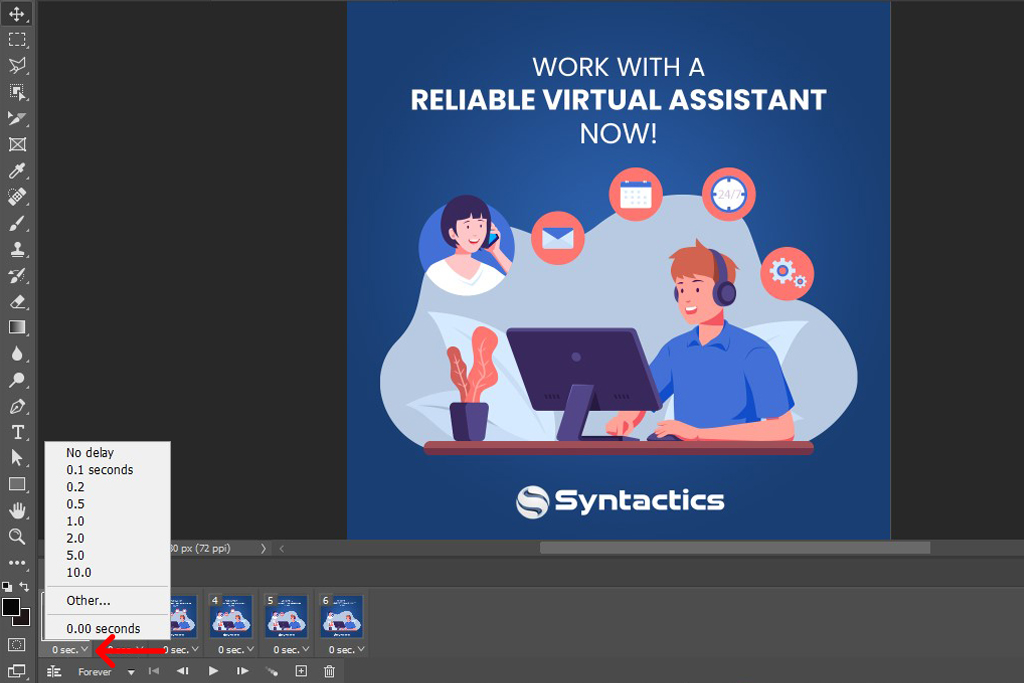
Choose how long you want the frame to appear from a selection: No delay, 0.1, 0.2, 0.5, 1.0, 2.0, 5.0, and 10.0 seconds. You can even input a specific time if you select Other!
Step 7: Set loops.
Looping refers to how many times your GIF will repeat itself.
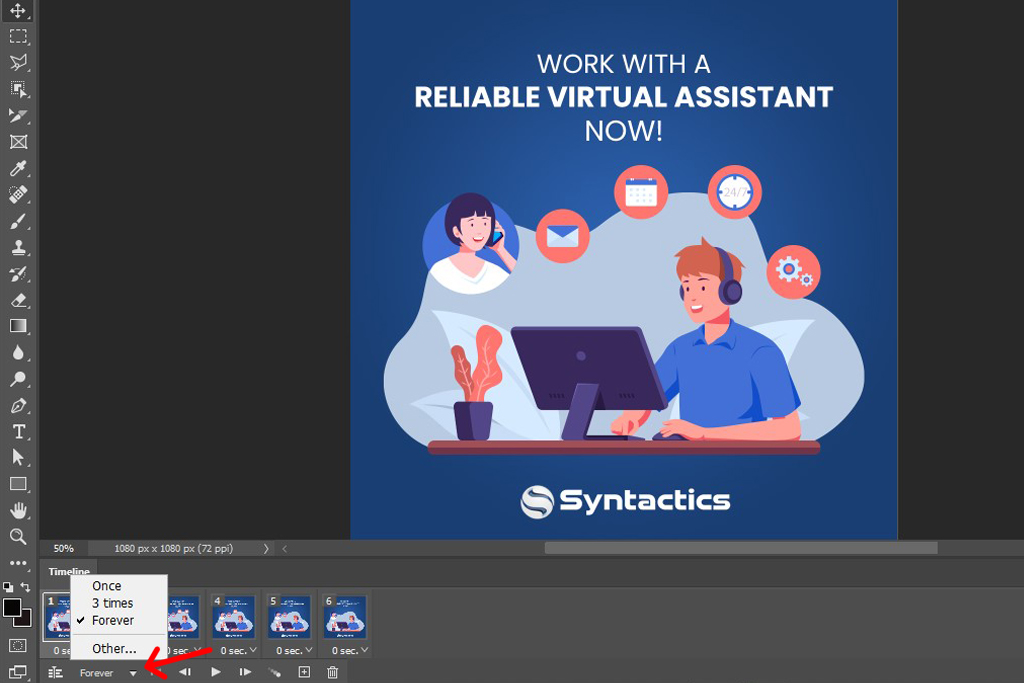
To make the GIF loop, go to the bottom of the toolbar. Then, click the drop-down menu, and you’ll be able to choose from Once, 3 times, Forever, and Other, which, of course, allows you to input a specific number of loops.
Step 8: Test run your GIF.
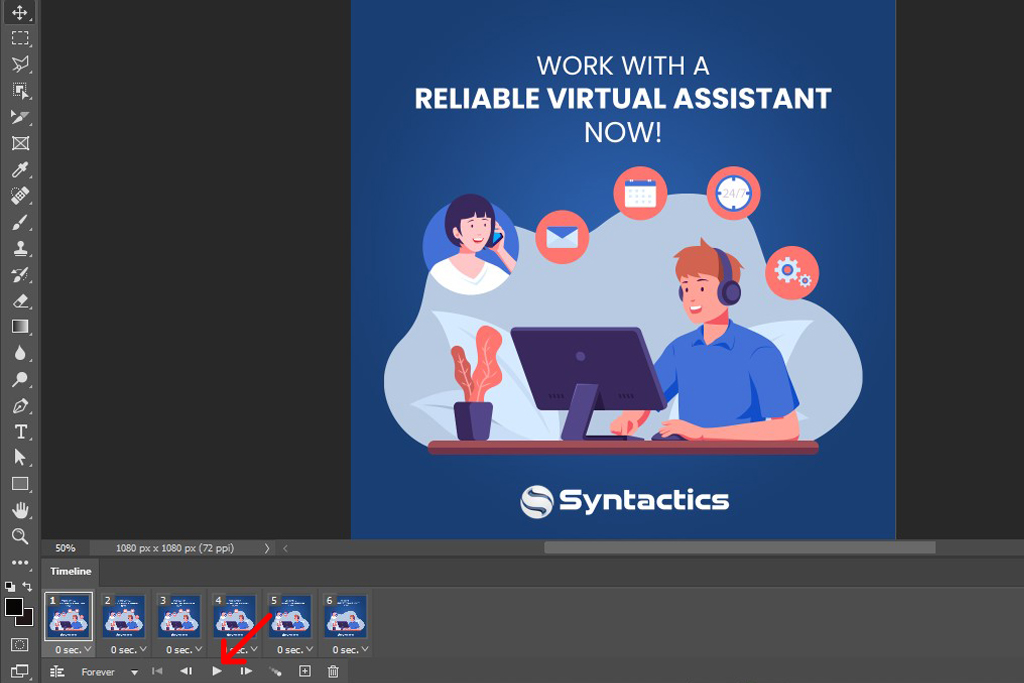
Press Play at the bottom of the Window timeline to see your GIF before you save it.
Step 9: IF your GIF checks out, save it and export!
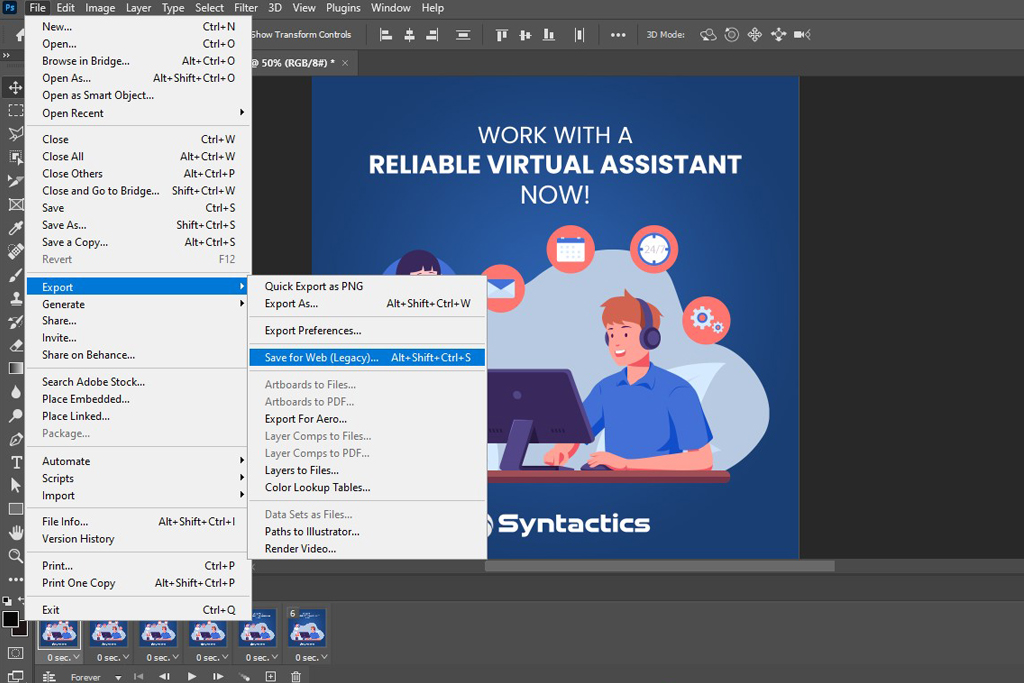
Once you’re happy with your GIF, go ahead to the navigation bar to click File > Export > Save for Web (Legacy)…
Then, go to the Preset drop-down to select the type of GIF file to save as.
Note that if your GIF has a gradient, use Dithered GIFs! There’s no need to select it otherwise. The number in each option will coincide with how close the GIF will look to its parent media. According to Adobe, “A higher dithering percentage creates the appearance of more colors and more detail in an image, but can also increase the file size.”
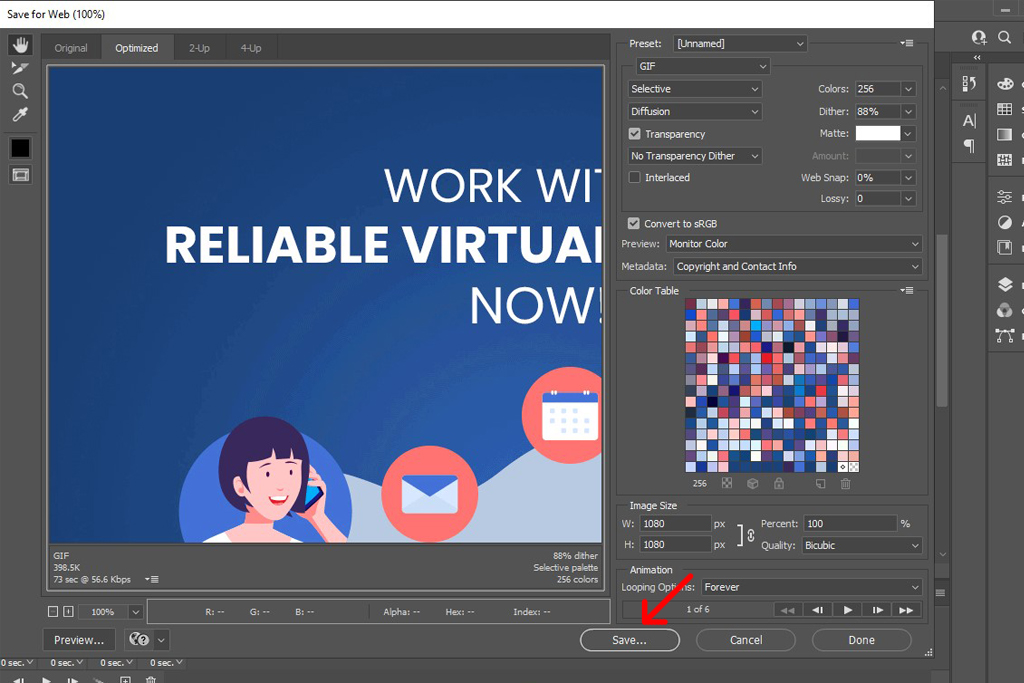
Click Save to finish creating your GIF in Photoshop!
And that’s it for how to create animated GIFs with an editing software.
Create animated GIFs in Photoshop for your Marketing
Creating an animated GIF in Photoshop is a straightforward process, it seems. Anyone with a computer can make them. However, many people seem to be content with simply seeing the files since they condense a feeling or, as the term goes, a mood. GIFs can instantly be posted to share how one feels.
Maybe you’re not a graphic designer nor a teacher trying to spruce up their PowerPoint slides. But, wherever you are in the design process—or if you just want to send funny moving pictures to your friends, hopefully, this article will make your future attempts seem like it’s no big deal, whoever you are in society. Still, hiring a skilled Filipino graphic designer can save time on creating GIFS, especially for marketing needs!
About Axel May Rivera
Axel is an avid fan of many dramas and songs. She is always eager to explore and discover more when it comes to movies and entertainment, especially in Korean and Filipino culture. In her free time, she enjoys reading books and playing badminton.

Related News:

Functional Testing: Meet Business Requirements!


Timing Your Emails For Maximum Open Rates


Comment 0