

Creating GIFs in Photoshop: A Step by Step Guide
Ahh, GIFs. And just to bury the hatchet early, they’re pronounced ‘jif(s)!’ Anyone with a computer can get hold of Graphics Interchange Format files. Did you know that you can easily create GIFs using Photoshop? Many people enjoy seeing GIFs on their social media timelines. So, take advantage of this when it comes to marketing!
According to Disqus, human brains can process images 60,000 times faster than text. Furthermore, 90% of the information processed by the brain is visual.
There’s no denying that humans are visual creatures. As a result, social media is one of the most utilized digital marketing tools today. Timelines are teeming with information about big brands, SMEs, and even startups. So how do you set yourself apart from everyone else? Well, you use a GIF on your marketing posts.
Why use GIFs for Social Media Marketing?
A picture paints a thousand words—what happens if you combine that with GIFs? They aren’t just for horsing around with friends on the ‘Net. GIFs have other purposes, namely, for digital marketing! Here are the reasons why:
- Though a GIF has no audio, it carries more content than a still image.
- While GIFs were once considered lightweight, modern uncompressed GIFs are actually notorious for high bandwidth consumption. Today’s social media platforms almost always convert uploaded GIFs into looped MP4 or WebM video files on the backend, since video codecs are far more efficient than the aging 256-color GIF format. If bandwidth and load speed are a concern, consider exporting your animation as a short looping video instead of a raw .gif file.
- Since it’s soundless, GIFs won’t catch anyone off guard with a sudden spike in volume. They’re less likely to startle potential customers.
- A lot less work goes into a GIF than a video. Scripting and filming aren’t required.
- GIFs educate or entertain your audience quickly. The runtime is short, but you can still pack a meaningful message in.
- GIFs convey moods with just moving images. Use emotions you want customers to associate with your brand.
How do you create animated GIFs in Photoshop?
The most popular content on the internet is visual media.
- Articles with images gain 94% more views than text-only content [Optimind]
- Image posts drive 2x more comments, while video posts earn 5x more engagement than text-only posts. [LinkedIn]
- Static image posts on Instagram achieved a 6.2% engagement rate, outperforming Reels at 3.5%. [ZoomSphere]
- Posts with visuals or videos can see up to 35% higher engagement than text-only posts. [X]
Don’t go overboard with the pictures, though. You’ll want to avoid having your posts or site pages load at a snail’s pace.
GIFs aren’t so hard to make. Likewise, this’ll be an easy guide. Read on for instructions on how to use Adobe’s most famous editing software.

Step 1: Prepare your Photoshop document (…and other important files).
This is probably the most basic first step, but it isn’t quite that simple! You have to state the file’s dimensions, resolution, and whatnots. But, take care that your photos (or videos) all fit within the confines of your document. If you’re not careful, then the whole document will be a huge bust! Also, mixing large and small pictures will doom your GIF to low quality.
Some extra tips: Don’t forget to use pixels! Also, keep resolutions low if you don’t want your GIFs to end up large. Lastly, make sure your color mode is RGB. Now you can open up that .PSD file with purpose!
Before you start stacking layers, consider converting your key assets into Smart Objects (right-click a layer and select ‘Convert to Smart Object’). Smart Objects preserve the original quality of your assets, so you can scale, rotate, or transform them during the GIF-making process without any permanent quality loss. This is especially useful if you plan to reuse or edit assets later.
Step 2: Load up the images you want to turn into a GIF.
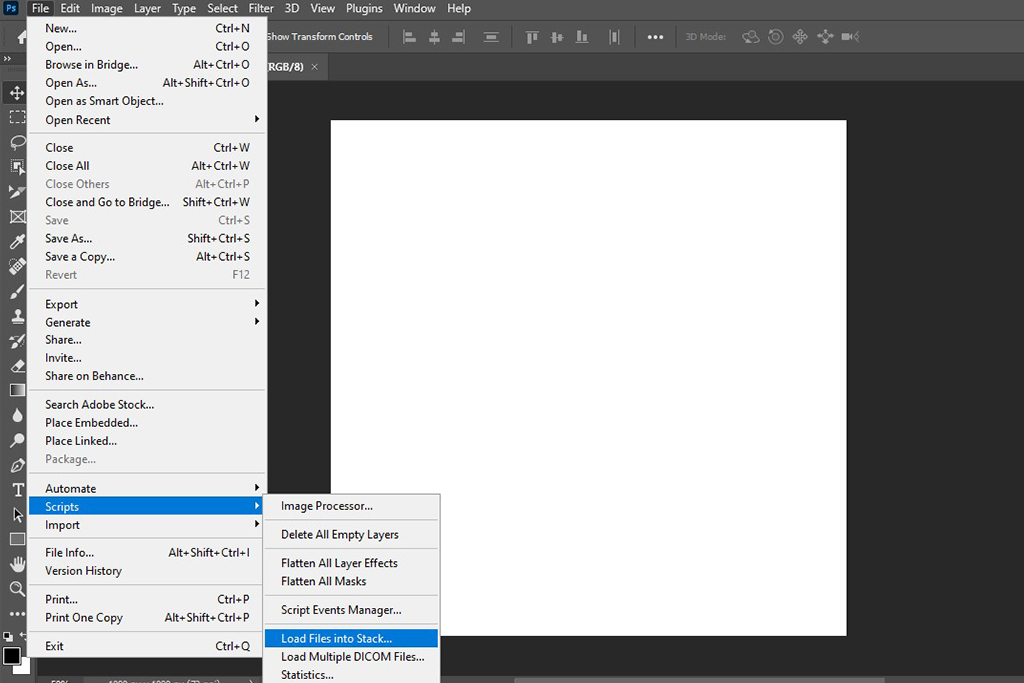
If your images are in the desired order, you’ll want to click File > Scripts > Load Files Into Stack.
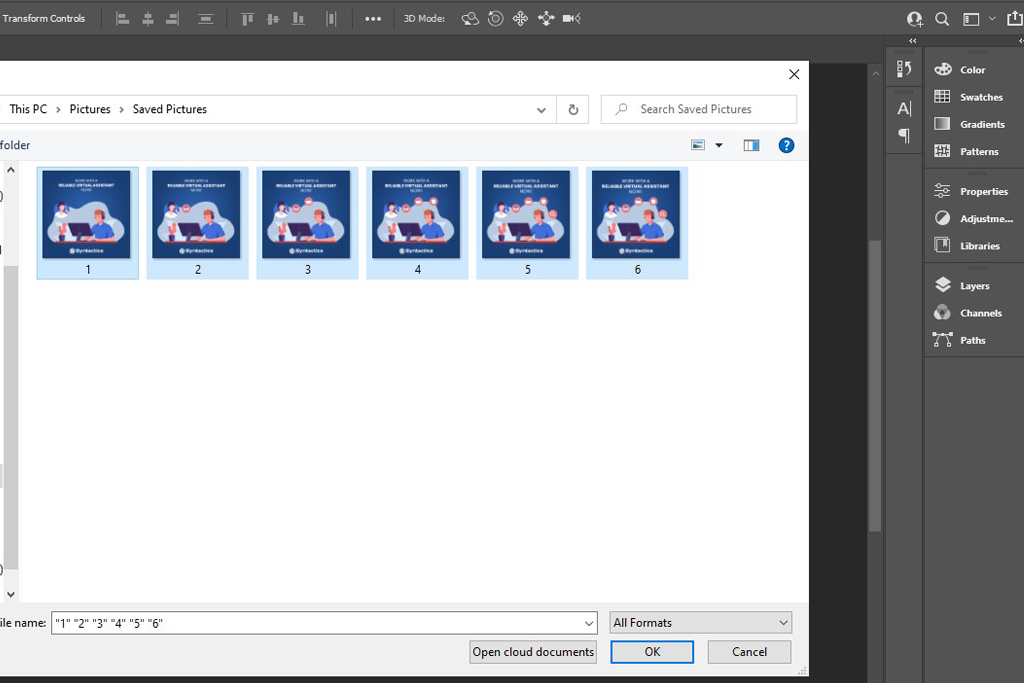
Next, click Browse and select the files you’re going to use in your animated GIF.
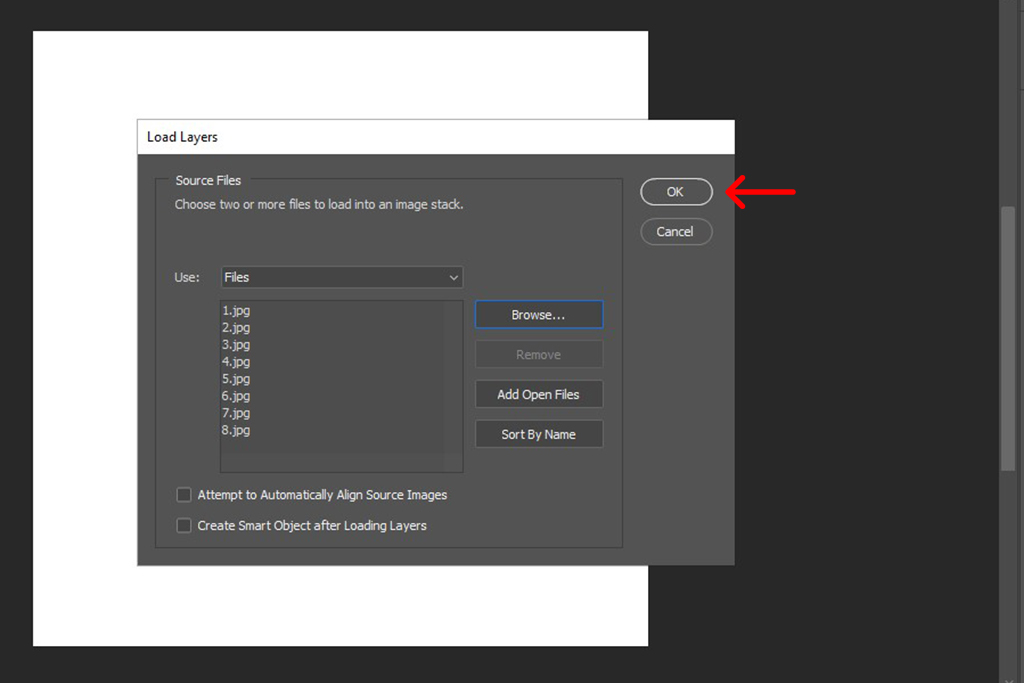
When done, click OK. Photoshop’s going to have a different layer for every image you picked.
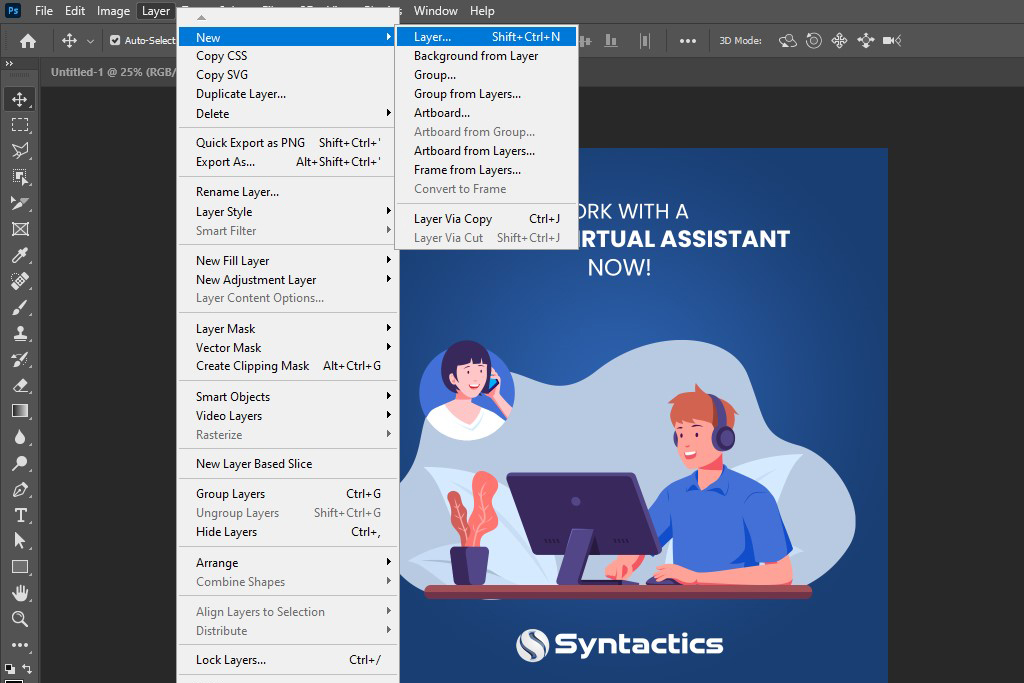
If you haven’t arranged your images, then have one layer for each frame of your GIF. To add a new layer, just go Layer > New > Layer.
Step 3: Open your Timeline window.
According to HubSpot, the Timeline lets you toggle different layers on and off for specific periods, turning your static image into a GIF.
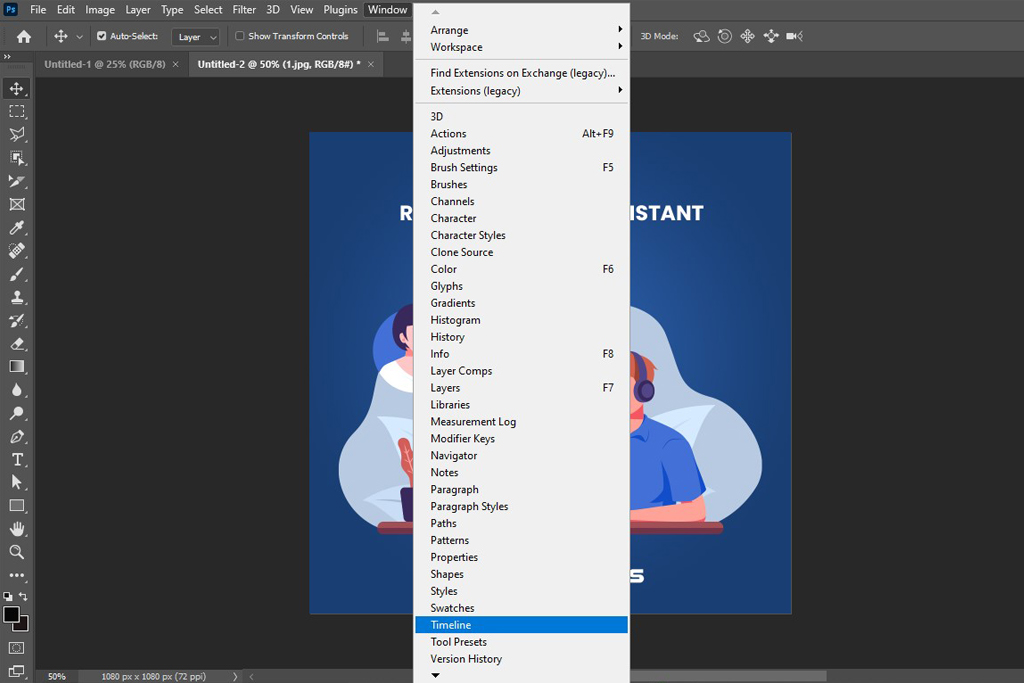
When you start up Photoshop, it’s not open by default, so go to the navigation bar and Select Window > Timeline.
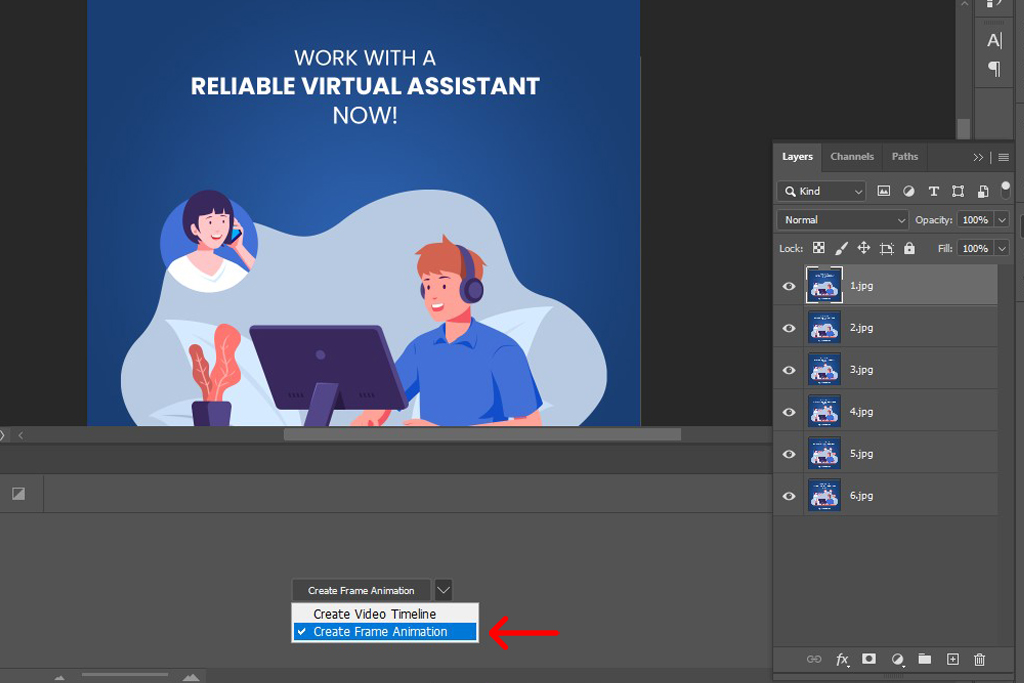
Once the window’s open, you’ll have the ability to create keyframes. Make sure the default—or ticked—option is Create Frame Animation. Click it, and on the Timeline window, you’ll see the frame animation options. There should now be at least one file in the Timeline.
In addition, the Frame Animation method shown in this guide works well for simple, image-based GIFs. However, if you’re working with smoother animations, transitions, or text effects, Photoshop’s Video Timeline mode offers more control.
To access it, click the dropdown arrow next to ‘Create Frame Animation’ and select ‘Create Video Timeline’ instead. The Video Timeline lets you use keyframes and easing for professional motion effects without manually building dozens of individual frames.
Step 4: Name your layers.
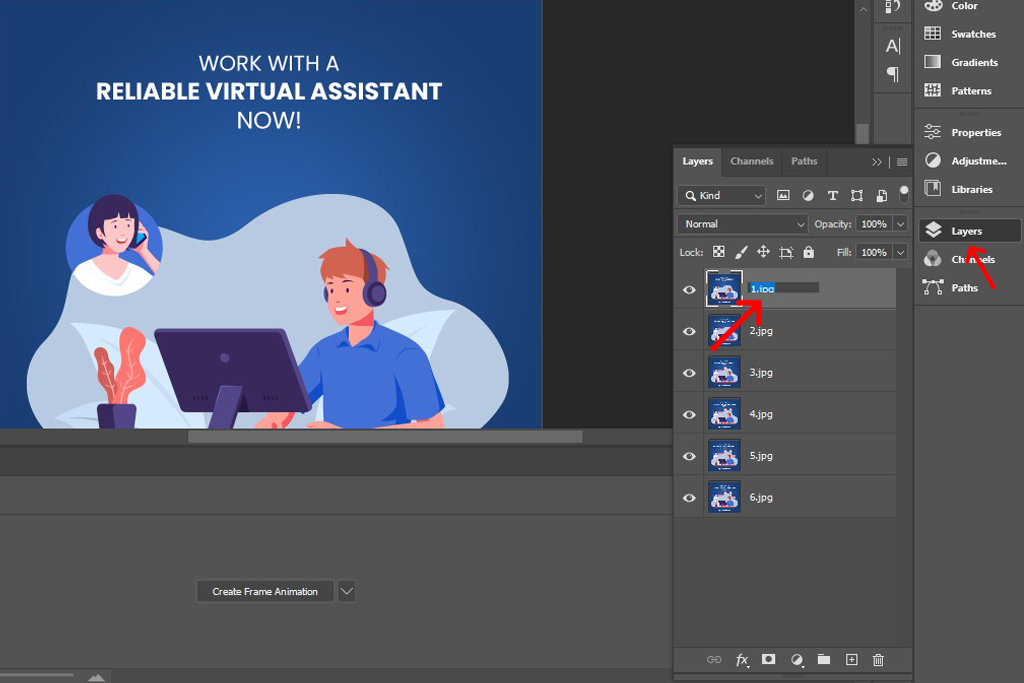
To better keep track of your layers, why not name them? You can do this by clicking the Layer panel (usually found on the bottom right), double-clicking on the corresponding thumbnail and then renaming it as you like. Don’t forget to hit Enter once done!
Step 5: Make Frames From Layers.
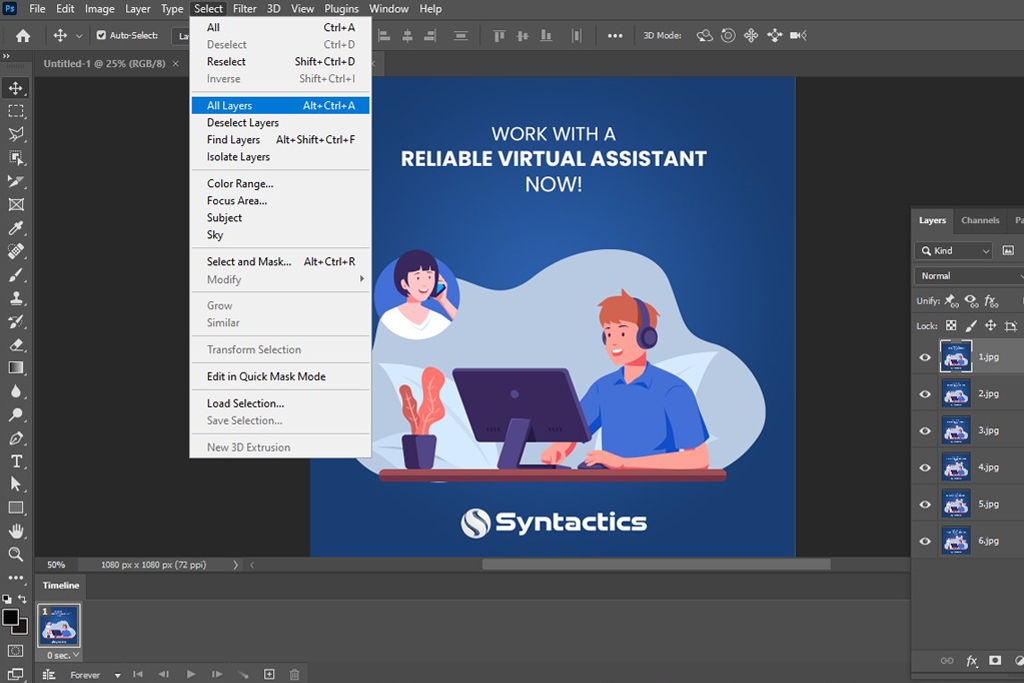
In this step, you must make a new frame for each layer if you haven’t already. If you haven’t, go to the navigation bar, then click Select > All Layers.
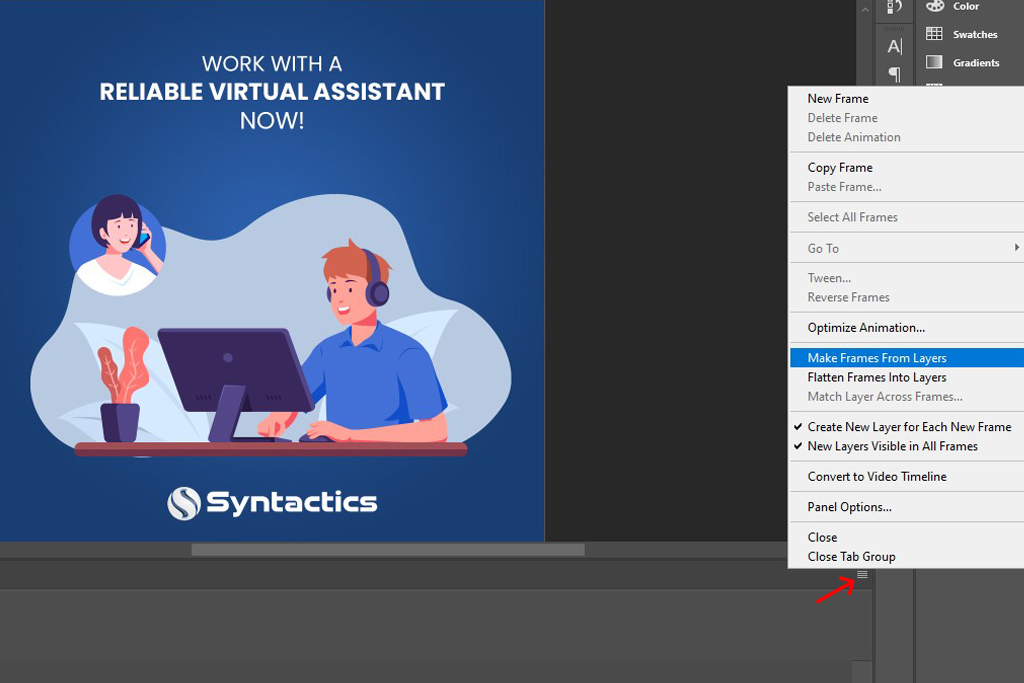
After that, click the little menu on the top right side of the Timeline window. A drop-down menu will appear, and you have to click Make frames from layers.
Step 6: Set up time delays.
In the Timeline window, beneath every thumbnail, you can see a time duration.
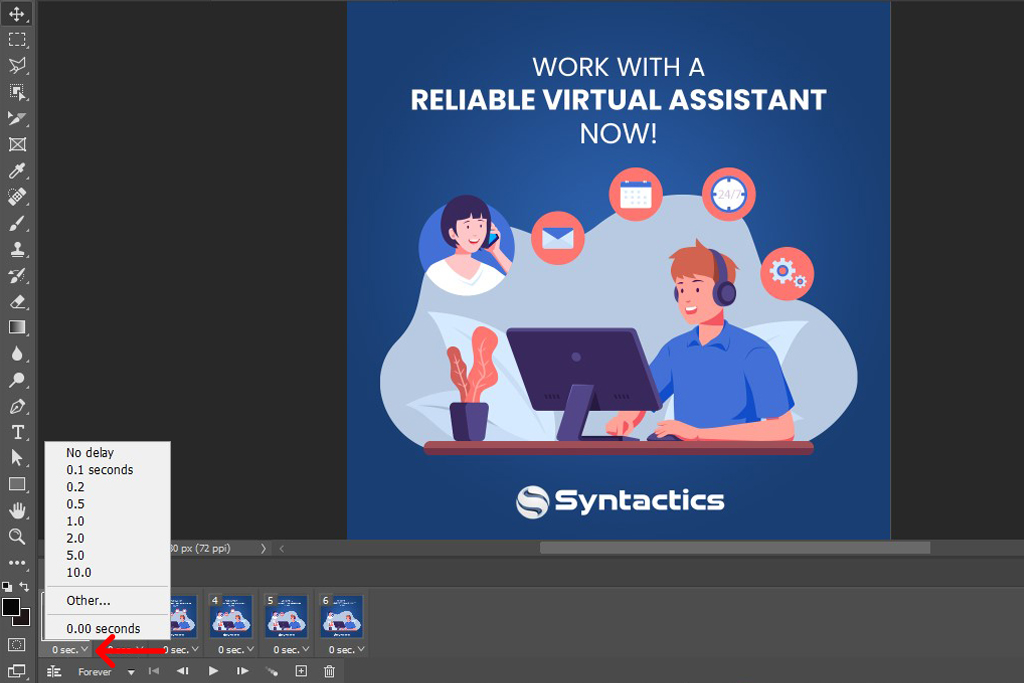
Choose how long you want the frame to appear from a selection: No delay, 0.1, 0.2, 0.5, 1.0, 2.0, 5.0, and 10.0 seconds. You can even input a specific time if you select Other!
Step 7: Set loops.
Looping refers to how many times your GIF will repeat itself.
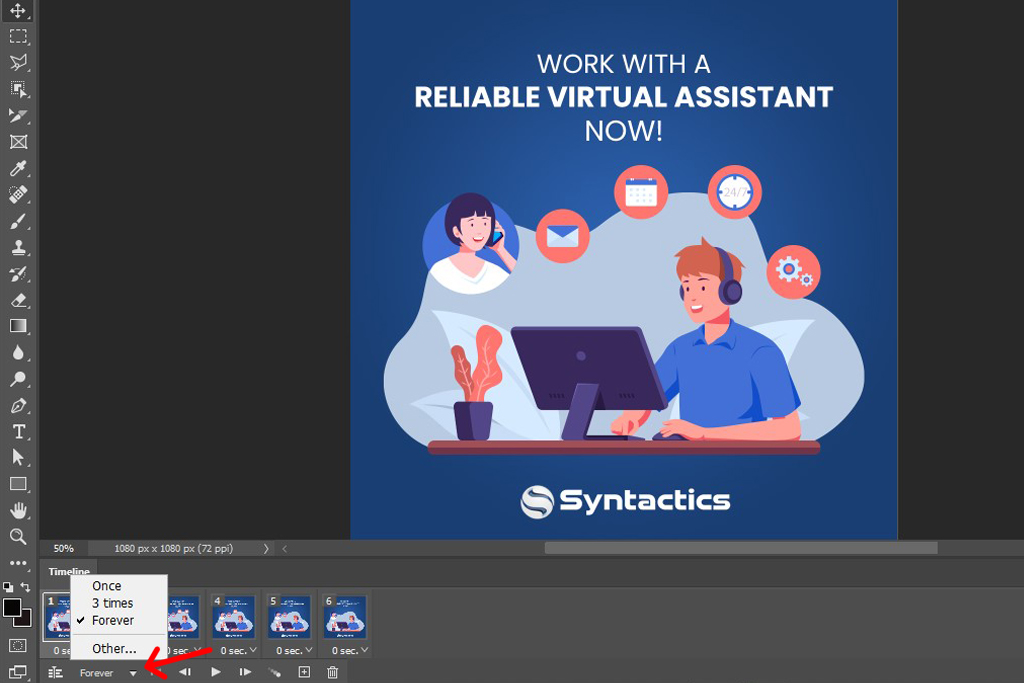
To make the GIF loop, go to the bottom of the toolbar. Then, click the drop-down menu, and you’ll be able to choose from Once, 3 times, Forever, and Other, which, of course, allows you to input a specific number of loops.
Step 8: Test run your GIF.
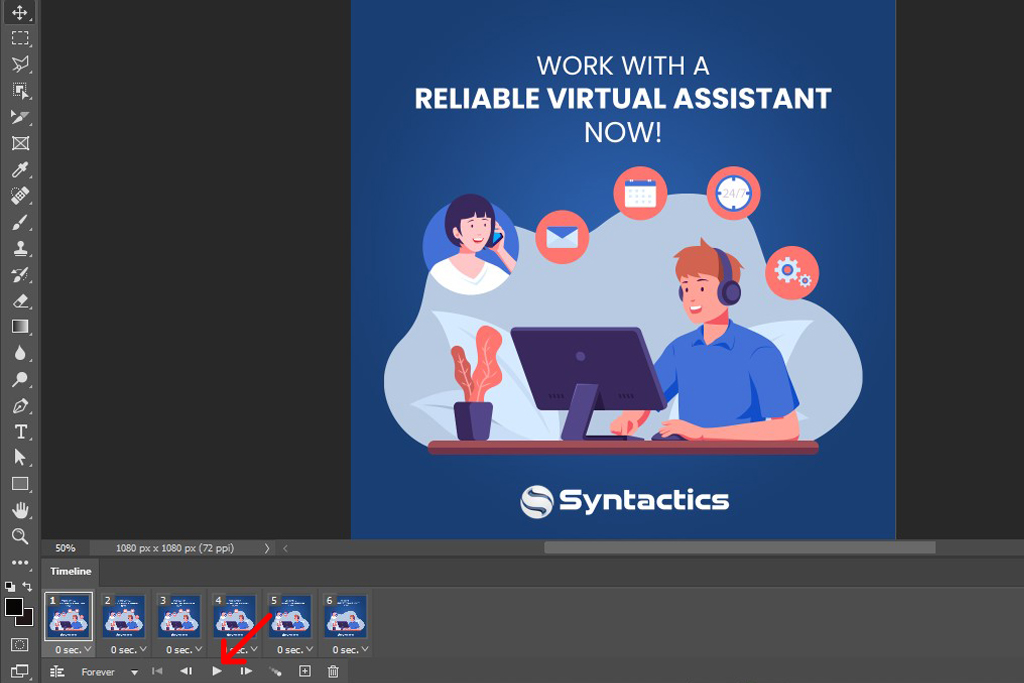
Press Play at the bottom of the Window timeline to see your GIF before you save it.
Step 9: IF your GIF checks out, save it and export!
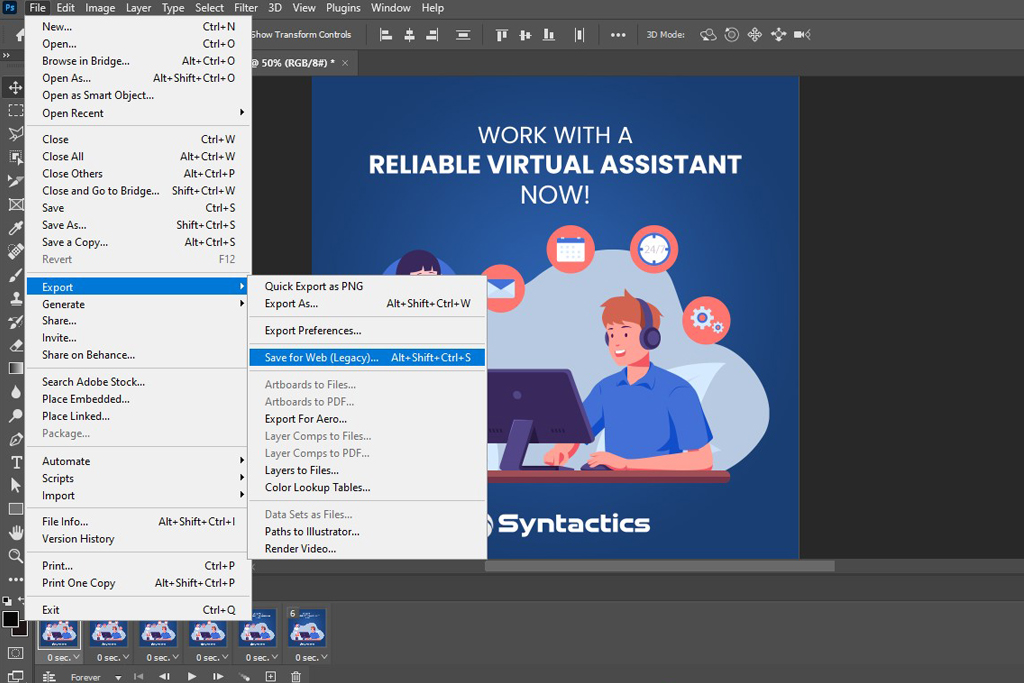
Once you’re happy with your GIF, go ahead to the navigation bar to click File > Export > Save for Web (Legacy)…
Then, go to the Preset drop-down to select the type of GIF file to save as.
Note that if your GIF has a gradient, use Dithered GIFs! There’s no need to select it otherwise. The number in each option will coincide with how close the GIF will look to its parent media. According to Adobe, “A higher dithering percentage creates the appearance of more colors and more detail in an image, but can also increase the file size.”
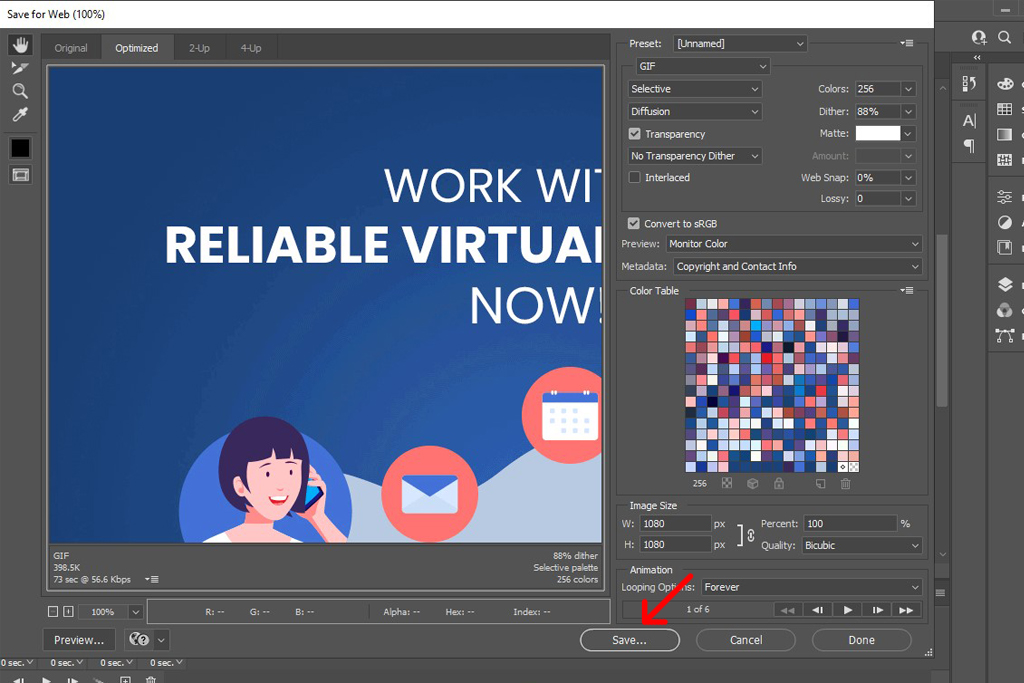
Click Save to finish creating your GIF in Photoshop!

GIF vs. Video Export: Which Should You Use?
Before you click Save, consider your distribution platform. If you’re posting to Facebook, Instagram, X, or LinkedIn, the platform will almost certainly re-encode your GIF as a looping MP4 or WebM on its end.
In that case, you may get better quality and smaller file sizes by exporting directly as a short video loop (File > Export > Render Video) and uploading that instead.
Reserve the .gif format for contexts where it is specifically needed. This includes email campaigns that support animated GIFs, messaging apps, or embedding in web pages where native video autoplay is restricted.
Create animated GIFs in Photoshop for your Marketing
Creating an animated GIF in Photoshop is straightforward. Anyone with a computer can make them. However, many people seem content with simply seeing the files, since they condense a feeling, or, as the term goes, a mood. GIFs can instantly be posted to share how one feels.
Whether you’re creating content for social media, presentations, or digital campaigns, engaging visuals can make a stronger impact. While GIF tools are more accessible today, working with an expert in graphic design services in the Philippines can help you produce polished, on-brand visuals faster to capture attention and drive engagement.

This article was updated on May 12, 2026.
Frequently Asked Questions
Can I create a GIF using a video clip instead of multiple still photos?
Yes, you can do this easily without manually capturing screenshots. Go to File > Import > Video Frames to Layers and select your video.
Why is my GIF playing backward after I clicked “Make Frames From Layers”?
This is a very common glitch, depending on how your layers were originally stacked. To fix it, click the menu icon in the top-right corner of the Timeline panel and select “Reverse Frames” to instantly flip the order of your animation.
Why is my exported GIF static and doesn’t move?
This usually happens for one of two reasons:
- You saved the file using standard File > Save As (which defaults to saving only the active frame as a flat image) instead of using File > Export > Save for Web (Legacy)….
- In the Save for Web export panel, your Looping Options (in the bottom-right corner) might be accidentally set to “Once” instead of “Forever”.

About Axel May Rivera
Related News:


How to Build a Responsive Website



How to Install a TikTok Ads Pixel on WordPress





Comment 0