
WordPress Hero Banner Setup: A Tutorial
Your website represents your business to visitors and entices people to interact with your posts or pages. After all, 94% of first impressions are related to Web Design. One way to get users’ attention is to use a Hero Banner. So, website owners need to know how to set up a Hero Banner on WordPress via the Cover block.
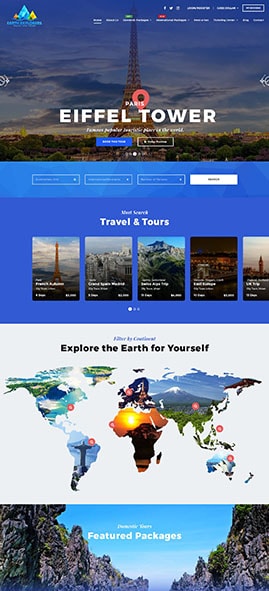
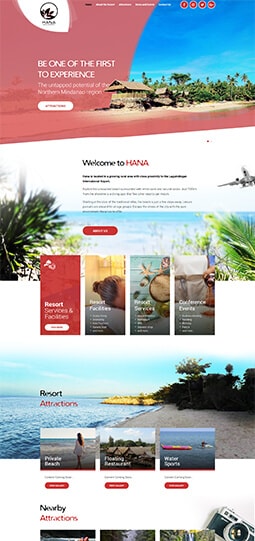
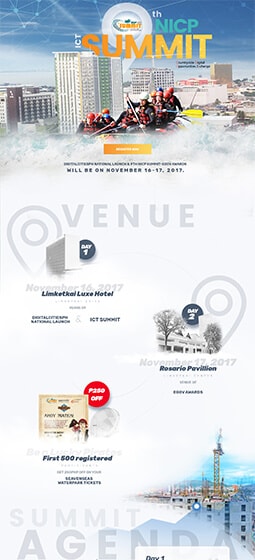
A responsive Web Design from a WordPress Developer in the Philippines can boost your business’ standing. For instance, a Hero Banner, also known as a Hero Image or Header, summarizes your brand. It prominently displays an eye-catching image or video that accurately summarizes your business.
They offer the following advantages:
- Usage of a single high-resolution image;
- Faster page load speed; and
- Better search results rankings.
Using the Cover Block to Create a Hero Banner on WordPress
Your site should load within three seconds and have a clearly-structured design. Also, due to Google’s Mobile-First policy, you must prioritize the mobile version of your website for Search Engine Optimization.
Hero Banners are necessary for an optimized website. They’re preferable to Hero Sliders, which are automatically-changing image galleries. These can slow down page load speed, negatively impact SEO rankings, and provide a poor User Experience.
Fortunately, you can utilize the Cover block on WordPress to create an attractive, responsive Hero Banner.
The WordPress Cover block allows you to create a hero section. Of course, you’ll need a single background image and add text on top of it via the block settings.
Step 1: Create Your WordPress Cover Block
Before you can enjoy the perks of a stunning Hero Banner on your responsive website, you must add a Cover block that serves as the foundation of your Hero Image.
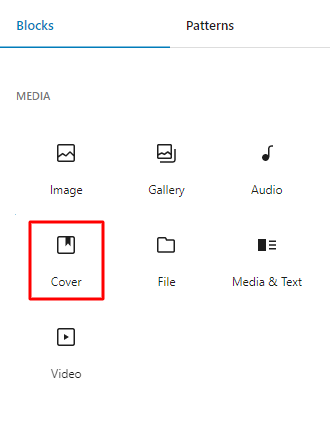
So, you can click the ‘+’ button to access the ‘Cover’ option.
Source: WordPress.
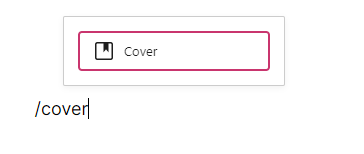
Alternatively, type ‘/cover’ to access it more quickly. Start the banner setup process by clicking on the Cover icon to add your block.
Choosing the Perfect Hero Image File
Choosing the perfect Hero Image is vital. After all, it’s your website’s main draw, considering its size and position on the screen. Your banner’s visuals and text should all tie together perfectly! Not only that, but you must select an image that doesn’t slow down your WordPress website, such as WebP files.
Here are some tips from a professional WordPress Developer in the Philippines for setting up an attractive Hero Header:
- Use abstract or decorative images, as WordPress doesn’t always display the full image.
- Avoid adding copy inside the image. Instead, type copy on top of it. This way, the text can scale to the screen resolution.
- The Cover block uses your chosen image as a background. Thus, it won’t display the entire image for different devices. But, if you want content in your image to appear on all devices regardless of size, it’s best to utilize an Image block.
Step 2: Select Your Image File for the WordPress Hero Banner
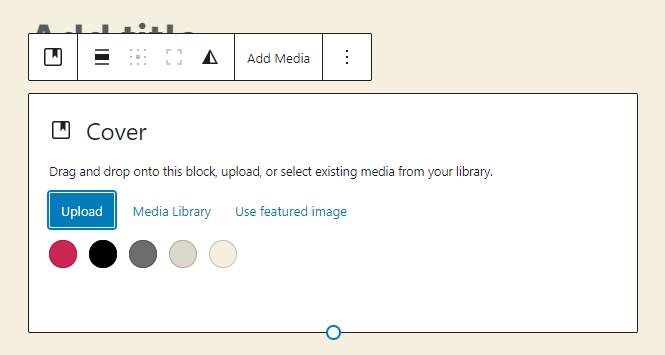
After adding your Cover block, you can either use Upload or Select Media to select your image file. To add a new image directly from your device’s media library, click Upload. On the other hand, Select Media will choose an image from existing website image files, Openverse, Google Photos, and Pexels Free Photos.
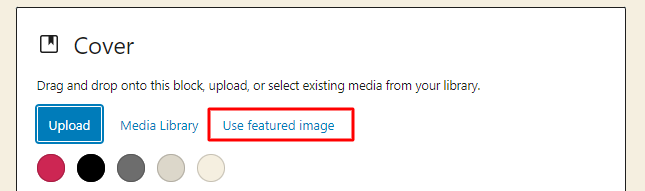
Also, you can select the Use featured image to use the Hero Image as a page’s Featured Image. However, if you don’t have an image prepared — Featured or otherwise — you can select the colored circles to fill in the background. You can change the color anytime via the block settings.
You can select the entire block anytime during the editing process. Additionally, you can click on the List View icon to open the toolbar and settings panel.
Step 3: Add Text (and Other Content) to Your Banner
After adding your image file or background color, you can add copy to it. Naturally, you need text to improve SEO on your WordPress Blog. A title that provides context to your banner is crucial. You can also add a paragraph block for more context about your business.
WordPress also allows you to add other blocks on top of your banner’s Cover block, including a button block. As a result, you can create a Call-To-Action button on your banner!
Step 4: Make Adjustments Using the WordPress Cover Block Toolbar

Source: WordPress.
Upon clicking the Cover Block, you’ll notice that its toolbar allows you to do the following:
- Change the WordPress block type;
- Drag a selected block;
- Move a selected block up or down;
- Align your Hero Image left, right, or center, etc.;
- Change the content orientation;
- Toggle an image’s full height;
- Apply a duotone filter on your images;
- Use your Hero Image as a Featured Image;
- Replace your image; and
- Additional options.
Specify Alignment
Much like with other WordPress blocks, you can align your banner to any alignment you see fit. So, you can use the toolbar to align the Cover block to the right, left, or center of your page. If you’re using either the right or left alignments, you’ll be able to add a block beside your Cover.
Source: WordPress.
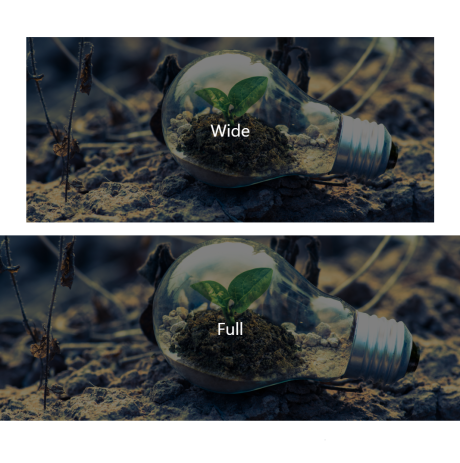
You can create unique headers if your theme supports Wide or Full-width alignment options. For the Wide width, the image breaks the bounding column. But the Full-width extends further than the Wide option and reaches the sides of the page.
Set the Content Position

The Content Position option adjusts where the content will be on the image. For example, you can choose the content orientation on a 3 x 3 grid, whether it’ll be on the:
- Upper left corner;
- Left middle side;
- Bottom left corner;
- Upper middle side;
- Center middle;
- Bottom middle side;
- Upper right corner;
- Right middle side; and
- Bottom right corner.
Full Height Alignment
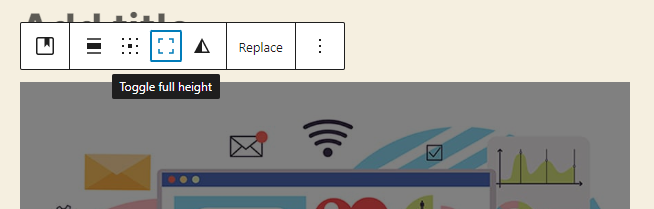
If you want your WordPress Hero Banner to always display its full height, go to the Toggle Full Height icon. You can find it on the Cover block’s toolbar.
Apply Duotone Filter
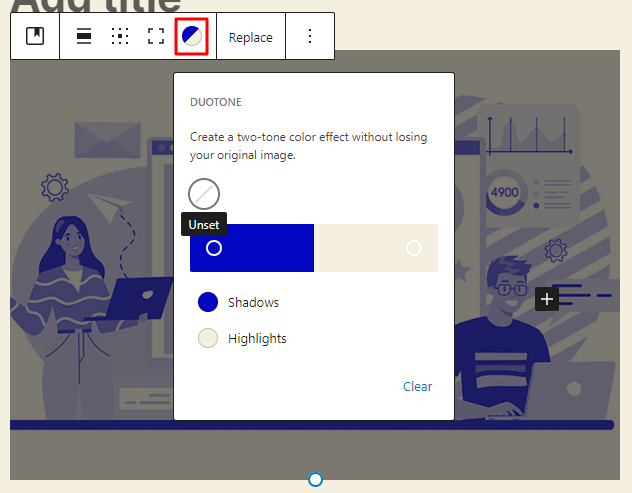
This setting allows you to add more personality to your selected Hero Image. The duotone filter lets you choose a color combination from the Cover block toolbar. Additionally, you have the option to set your own duotone filter colors. As a result, you can have your banner reflect your brand’s color palette!
Display the Featured Image via the Cover Block
As mentioned earlier, the Cover block displays a Featured Image at the top of your page or post. But first, you must add your desired image, then add a Cover block using the methods from Step 1.
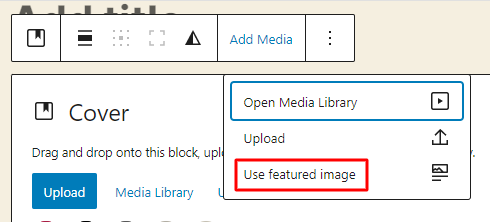
From your toolbar, select the ‘Add Media’ option. After, a drop-down menu will appear, containing the option ‘Use featured image.’ Click on this to add a file as a Featured Image.
Replace a Current Image
Lastly, if you want to switch out an existing image with another, you can use the Replace option on the Cover block toolbar.
Step 5: More Adjustments With the Cover Block Settings
Upon clicking your Cover block, you can find more styles in the sidebar to your right. However, if these settings aren’t visible at first, you can click the Settings icon. It looks like a square with uneven columns.
Utilize Cover Block Styles
The styles in your settings can add a wave effect. You have three options:
- Default;
- Bottom Wave; and
- Top Wave.
Turning the Image into a Fixed Background
To add more visual excitement to your WordPress Hero Banner, consider using the parallax effect or Fixed background style. Then, the cover image’s frame will scroll or move with your page.
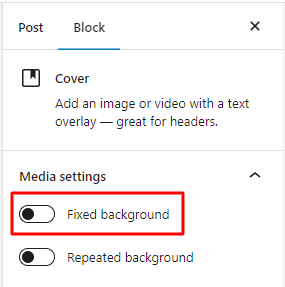
To toggle the image to make it a Fixed background, click the toggle located in the block settings sidebar. However, if you choose not to fix the background, the image won’t scroll.
But some mobile devices might disable parallax effects to preserve page performance.
Repeating the Background
This option allows you to make a pattern from a single image via the Cover block. It’s best to use a small image — the smaller your file, the more it multiplies!
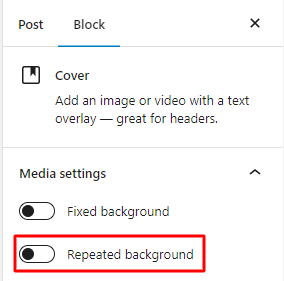
You can find the Repeated Background toggle option in the Cover block sidebar’s Media Settings option. It’s right underneath the Fixed background toggle.
In addition, you can toggle both Repeated and Fixed background options, but if you’re using the Repeated background style, you don’t have to use the Fixed style. Still, a WordPress Developer in the Philippines can experiment with them to see what suits your design requirements.
Picking a Focal Point
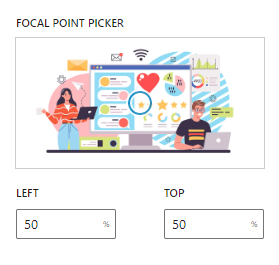
If you didn’t apply the Fixed background style, you can see the Focal Point Picker. The tool allows you to find and select your Hero Image’s focal point. As a result, you can highlight the most crucial part of your image file.
You can click on the picker and drag it to your desired focal point. But, a WordPress Developer in the Philippines can also manually set the point with the position percentages.
Adding Image Alt Text
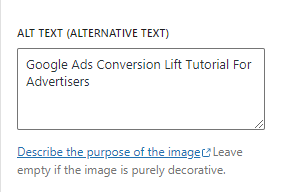
To improve your SEO and accessibility, you can add Alt Text to your image. Alt Text is a vital consideration for image Anchor Text.
Clear Your Media from the Cover
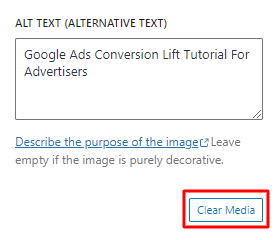
To use a solid color for your Hero Banner rather than a media file, you can remove your banner image by selecting the ‘Clear Media’ option.
Add an Overlay Color to Your Hero Image
A color overlay can add more excitement to your Hero Header. The default overlay is a transparent gray color, but you can use plenty of color options. In addition, you can set opacity — more on that in the following section!
Of course, a WordPress Developer in the Philippines can use your business’ color palettes to better align with branding. A signature color for a business increases brand recognition by 80%! You can find the Color Overlay option in the Cover block sidebar under the Overlay option.
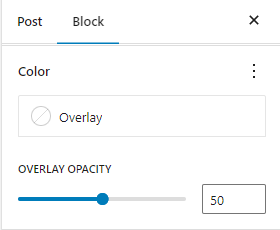
Set Overlay Color’s Opacity
The slider in the Background Opacity section ranges from 0 to 100. The closer the slider is to 0, the lighter and more transparent your image overlay. The overlay disappears when the slider is at 0, but not your image.
If you plan on adding text to your WordPress Hero Banner, the overlay should be a bit opaque, so the title is easy for users to read.
Adjust the Banner’s Typography
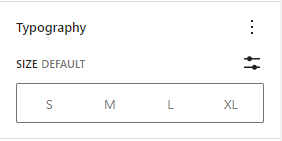
You can adjust how your block text looks with the following settings:
- Font size. So, you can adjust text size using the small, medium, and large presets. But there’s also the option to set specific values in pixels and em and rem units.
- Font family. With this option, you can change the font style via a drop-down menu.
- Appearance. Here, you can change the font style to regular, italic, bold, or even a combination of the three.
- Line height. This lets you set the spacing between text lines.
- Decoration. This setting offers options for underlined text and strikethrough.
- Letter case. Here, text can be set to all uppercase, all lowercase, or proper capitalization.
- Letter spacing. This setting sets the spacing between characters.
If you can’t find these typography settings, click the three dots next to the ‘Typography’ option.
Set the Image Dimensions
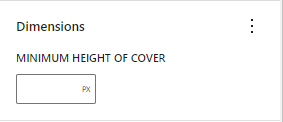
With this option, you can set your Hero Image’s minimum height in pixels. This way, you can ensure that the image will be displayed as high as necessary, regardless of the user’s screen size. Also, you can use padding to increase the space around the content within the block.
Create a WordPress Hero Banner on Your Website Today!
Your website communicates vital information on your brand and its products or services. In addition to being accessible for visitor interaction, a responsive website is great for SEO. The ideal Hero Banner or Image can significantly boost brand recognition with users. So, the best way to set up a Hero Banner via WordPress is with the Cover block.
The Cover block displays images you can use as backgrounds. WordPress allows users to adjust the Hero Image to reflect their branding better. Then, you can add text to share essential information about your business.
A business site represents your brand to users, not just in terms of visual design but also in its functionality. A WordPress Developer in the Philippines can help your business refine its Web Design and increase the amount of time a website visitor spends on your pages.
About Adam Tan
Adam is a charming geek who loves his family's Siberian Husky, enjoys the occasional night out with friends and, most of all, lives and breathes new trends and updates about the web and its technicalities. If you want to stay updated with changes or new trends on the web or learn about the technicalities that are involved, he's your guy. He's capable of writing cheesy stuff as well, but he'd rather stick with the manly stuff.
- Find more about me on:


Related News:


Digital Marketing Lessons Learned from 2020
Website Loading Issues: Fix Them Quickly


Great Web Developer: Qualities to Look For

Comment 0