

WordPress Form Setup: A Step-by-Step Guide
Often, some website owners add their business’ contact information on critical pages. While this can be helpful, it can open up your communication lines to spam. So you must know how to add an online form to your WordPress pages.
Adding forms to your WordPress pages allows visitors to send you vital information. As a result, you can follow up with them about their concerns or inquiries later on.
In addition to offering advantages to both a website owner and its visitors, creating and adding forms isn’t difficult, either. It’s as easy as finding the right plugin, such as Gravity Forms, which has a staggering 57.84% market share.
WordPress Forms and Their Importance to Your Website
Forms — such as contact forms — are beneficial for your WordPress website. Here’s why you need them on your website:
- Consistent recording of information. A form lets you specify required details like names, phone numbers, concerns, inquiries, etc.
- Helps add more people to your mailing list. Forms can get details about people who are interested in your brand and what you have to offer.
- Provide better customer support. You can streamline the customer service process with an online form.
- Saves time. Through the form, you can tell people to check a video or wait a number of hours for a response, etc.

Additionally, online forms can foster trust with users, give insights on visitors, and track your leads and messages. Website forms can significantly benefit your site, and you can tailor them to your needs. Here are some online form types you can add to your web pages:
Common Form Types You Can Use on Your Website
Contact Forms
Contact forms are a common yet convenient form type. They allow website visitors to contact a business or website owner. These WordPress forms gather crucial information from visitors for later follow-ups.
To create a Contact form, you need to add fields for the following:
- Visitor name;
- Email address;
- The subject of concern; and
- Message.
Lead Generation Forms
Lead generation forms are like contact forms, gathering valuable details from visitors. However, these forms collect vital Lead Generation-related details for further marketing efforts. Your business can always rely on forms to generate leads!

Source: FinancesOnline.
Lead generation forms get information on people or potential leads interested in your business’ products, services, or content. They’ll often ask for the following:
- Visitor name;
- Email address, sometimes their business email;
- Contact number;
- Added details like job title, company name, where a visitor found out about the site, etc.
Subscription Forms
Of course, subscription forms will collect details on people who want regular updates — such as newsletters — about your brand. This form type allows website owners to create a mailing list that’s key to their Email Marketing efforts.
With these forms, you can engage with your audience, provide information or content, and promote your products or services.
Survey Forms
Survey forms will gather feedback and other insights from website visitors. You can get a great idea of customer preferences or satisfaction levels. Survey forms are a great way to conduct market research or collect data to refine your products or services.
These forms may include the following:
- Multiple-choice questions;
- Rating scales; and
- Text or comment fields.
Feedback Forms
Feedback forms collect opinions, concerns, or suggestions. So they’re perfect for giving visitors a place to voice their concerns about your products, services, or website. However, “only about 4% of customers” air out complaints to companies. Thus, hearing them out is vital to retain more customers and improve your business.
The forms can draw attention to product or service concerns, improving User Experience. These forms have open-ended questions or comment fields for users to share their thoughts.
Order or Registration Forms
Order or registration forms will gather critical data to purchase products or services or create accounts. So, you can often find these forms on eCommerce websites or sites asking users to register for an account.
Need a Professional eCommerce Website?
Drop Us a Line!
The forms will get essential information from users depending on the situation. So, order forms require shipping and billing addresses and payment details. As for registration forms, not only do they require basic personal information, but also the following:
- Usernames;
- Passwords; and
- Added details depending on the site’s requirements.
WordPress website forms can serve various purposes, and you can add custom forms depending on your needs. You might think that adding forms to your website requires advanced coding knowledge. But fortunately, you can always rely on a WordPress plugin to make form creation easier.
Here’s a guide to creating and adding a form to your WordPress web page.
How To Create WordPress Forms and Integrate Them Into Your Pages
Before You Start: Popular WordPress Form Plugins
Forms can be helpful to your business WordPress site. Thus, it’s vital to find the best WordPress form creation plugin. Before creating your forms, you must consider your plugin options and weigh them according to the following factors:
- Ease of use;
- Features; and
- Compatibility.
There are several popular plugins to create your forms, including WPForms, a popular, beginner-friendly option for WordPress site owners. WPForms Lite is the plugin’s free version, but you can upgrade to its Pro version.
Lastly, Gravity Forms is an excellent option for building forms. “956,999 live websites” use the Gravity Forms plugin.

Gravity Forms also has a drag-and-drop builder with a wide variety of features, including the following:
- Conditional logic;
- Quizzes;
- Surveys;
- User registration forms; and
- Multi-page forms.
We’ll be using the Gravity Forms plugin for this guide.
Step 1: Install and Activate the Gravity Forms Plugin
Before creating your forms, you must purchase and download the Gravity Forms plugin. However, it’s crucial to remember that you need to select the correct license for your project requirements before buying it. So buy and download the plugin before installing and activating it.
You must go to the Plugins section in your WordPress dashboard. Afterward, click Add New, then Upload.
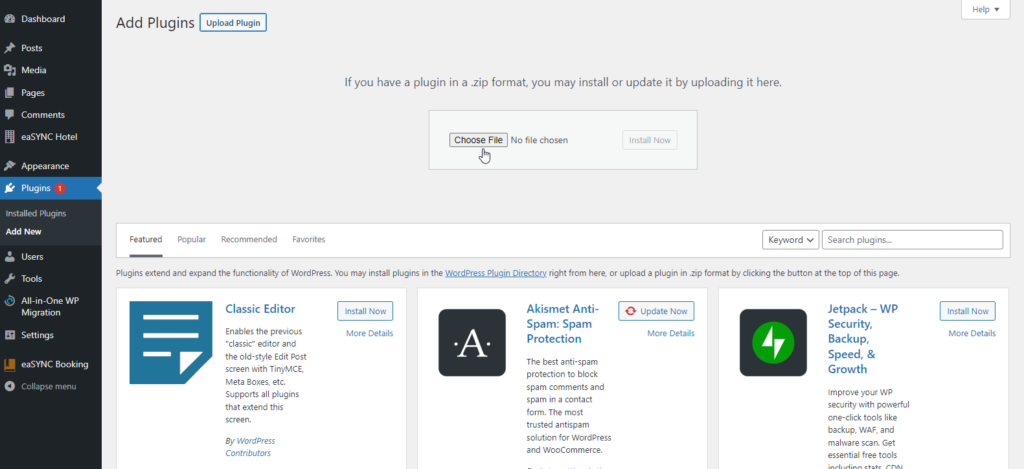
You’ll have to select the Gravity Forms plugin zip file on your computer, click Install, then Activate.
However, once you’ve installed the Gravity Forms plugin, follow the instructions to register it.
Step 2: Create a New Form with the Gravity Forms Plugin
Once you’ve integrated the Gravity Forms plugin into your WordPress, you can use the interface to create a new form.
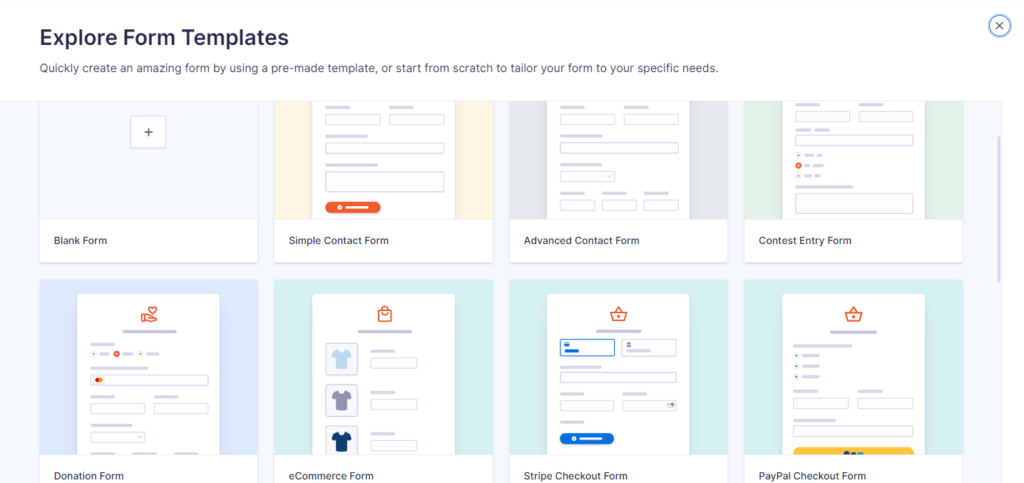
Go to the Forms section from the dashboard and click New Form.
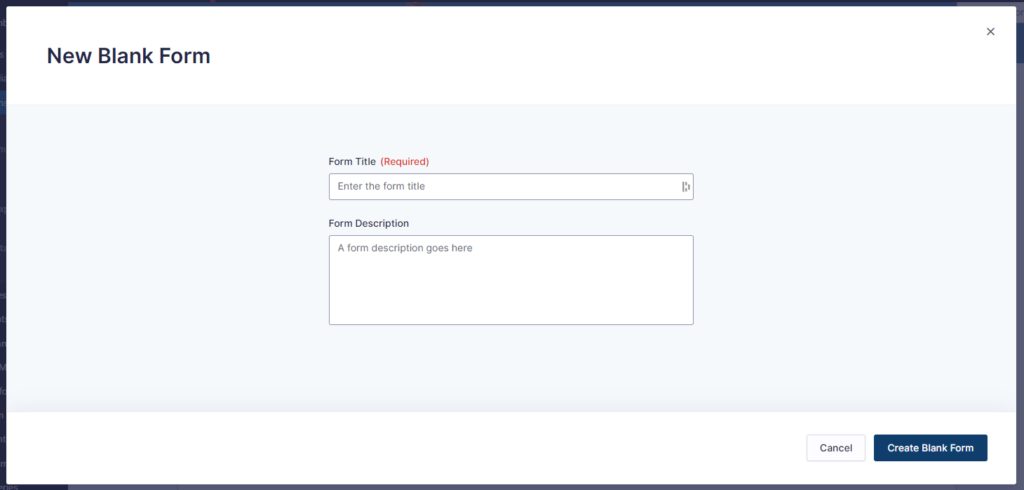
You must give the form a name (you can create a description, which is optional), then click Create. Afterward, Gravity Forms will send you to its form builder.
Step 3: Customize the Form Fields
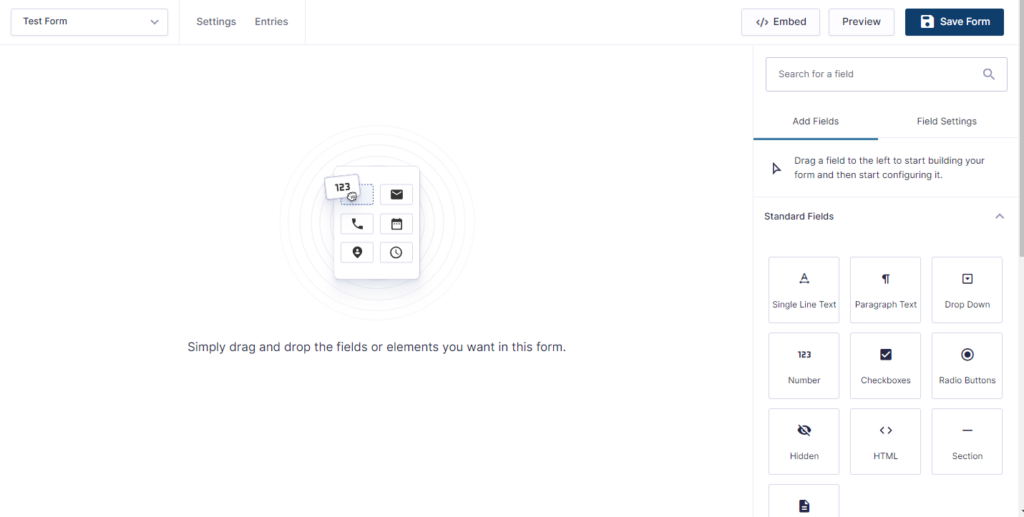
The plugin’s form builder will allow site owners to create their forms and edit various aspects to their liking. Of course, you can manage how the form will look on both the front- and back ends of the WordPress Website.
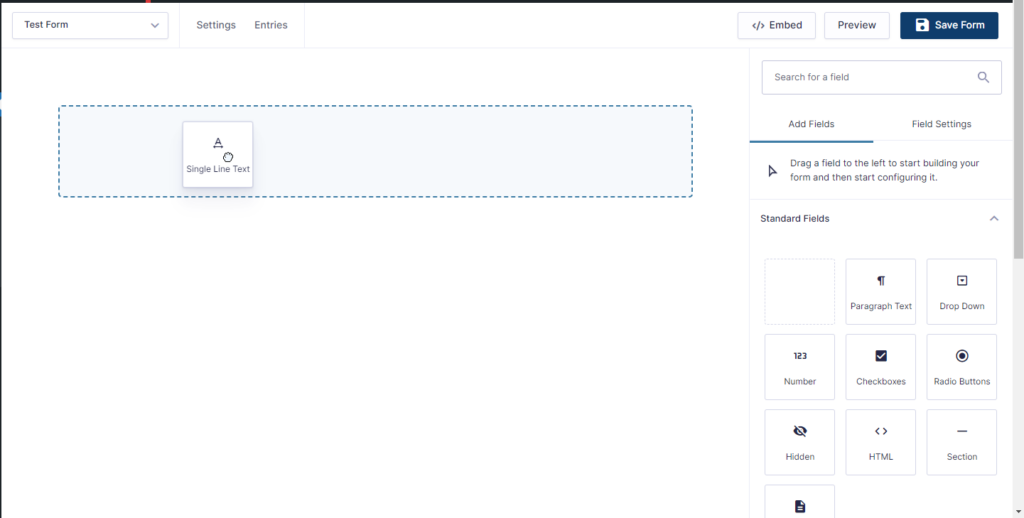
To add a field, drag one from the field listing on the right and bring it to the builder canvas. There are several sections to your fields:
- Standard Fields, which include Paragraph Text, Dropdown fields, Checkboxes, etc.
- Advanced Fields, which include fields for Name, Email, Phone, and Address.
- Post Fields are necessary for creating posts from form submissions.
- Pricing fields integrate payment gateways and configure product options.
You can create a basic form with a few fields or add as many as needed. For instance, contact forms need the following fields:
- Name;
- Email address;
- Paragraph text (which should be relabeled as Comments or Questions, depending on the situation);
- A consent field, so users can agree to your site handling your data; and
- A CAPTCHA to prevent visitors from submitting spam.

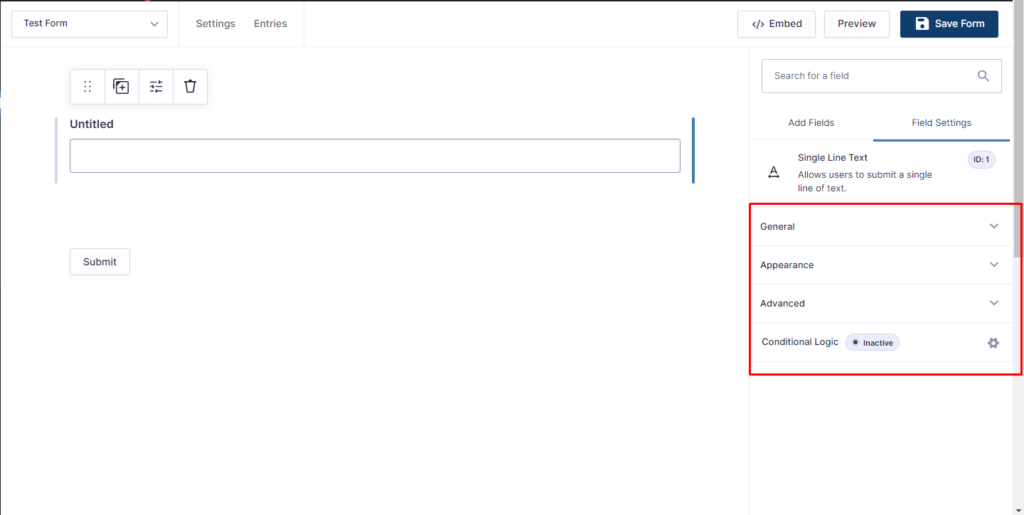
After selecting your fields, you can customize their settings, such as:
- Customizing the labels;
- Creating a CSS class to further style the form;
- Enabling conditional logic for fields, etc.
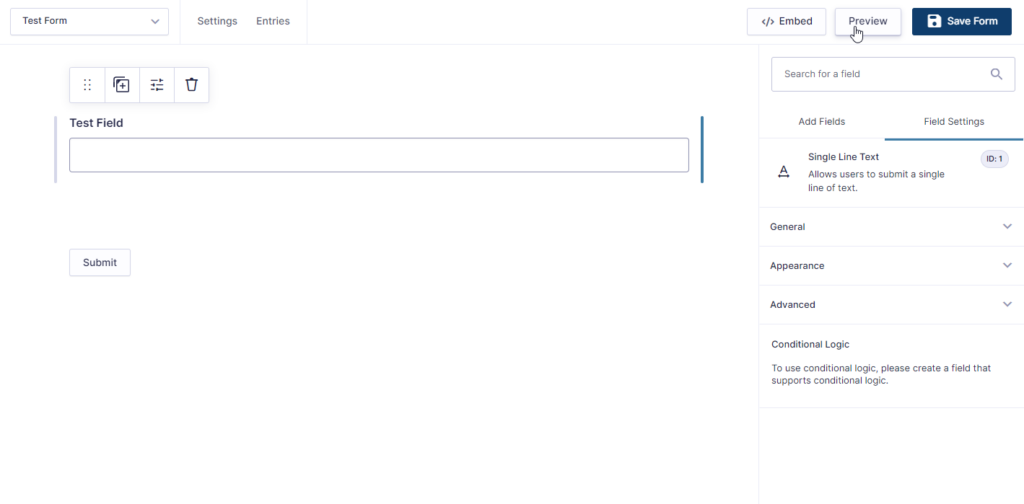
To check how your form looks, click the Preview button. Lastly, once you’ve created your form, click Save Form.
Step 4.1: Configuring the Form Confirmation Options
A confirmation message can further build rapport after a website visitor submits your form. It’s best to use a customized thank-you message. Also, you can redirect them to blog content or a page for downloading resources.
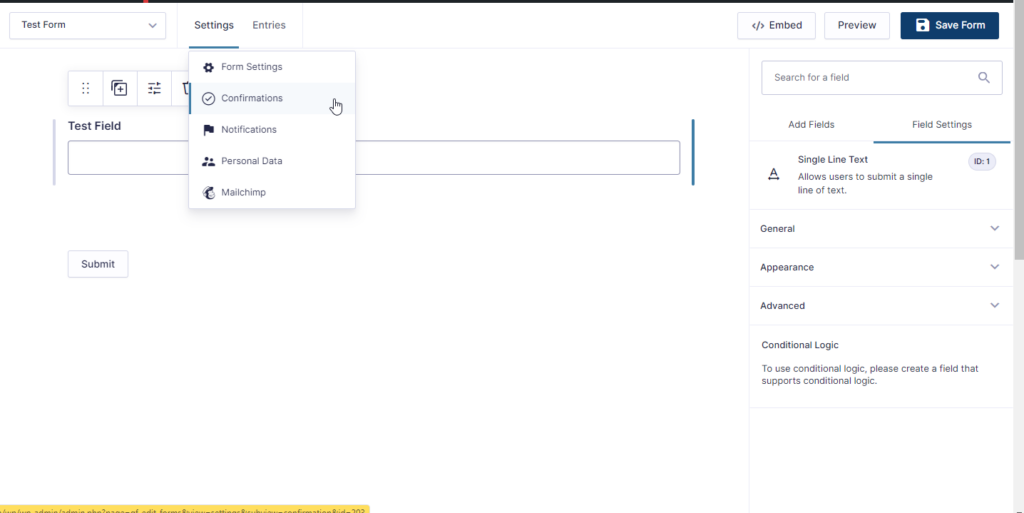
After you’ve created a visually-appealing online form, you can go to the Form Settings. You must use the settings to work on your notification and confirmation messages. As a result, you can ensure a positive experience after a user submits a form.
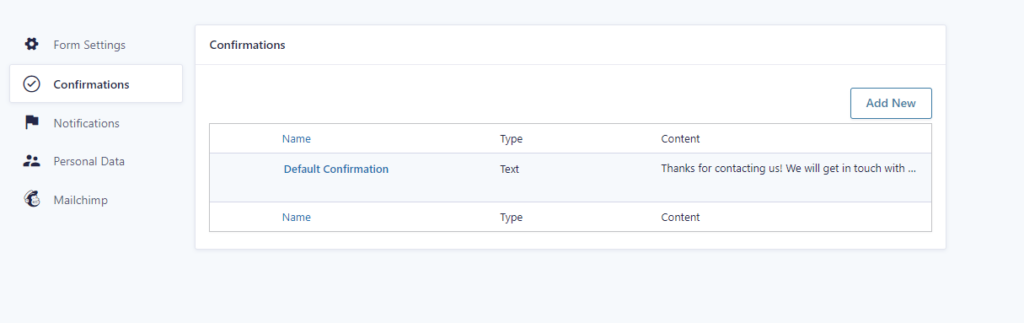
You can create a custom message via the Settings tab and click Confirmations in the form builder. Then, you can create a special confirmation message for users via the Confirmation Message box.
Tutorial: Creating a WordPress Thank You Page!
To redirect a user after their form submission, click the Confirmation Type dropdown menu, then click Go to URL. Afterward, you can enter the destination URL address. Lastly, don’t forget to save the changes to your online form.
Step 4.2: Customize Form Notification Settings
After a user successfully submits a form, Gravity Forms will send a website owner an email notification. Then, owners can send timely email responses to the users who submitted the form and continue the engagement.
As with the custom message in Step 4.1, you can tell a user what to expect or do after the submission.
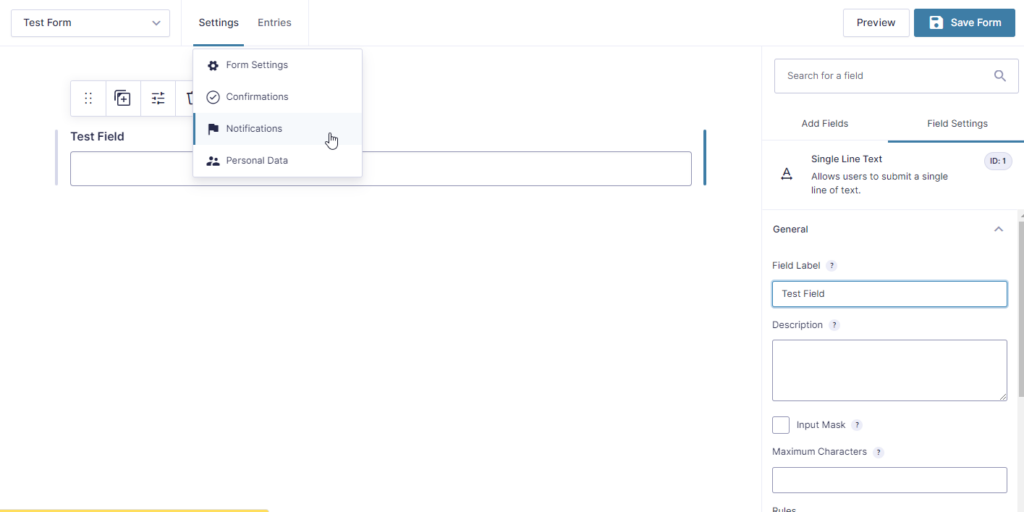
So now, you should also take care of Form Notifications and create notifications for users who submitted a form.
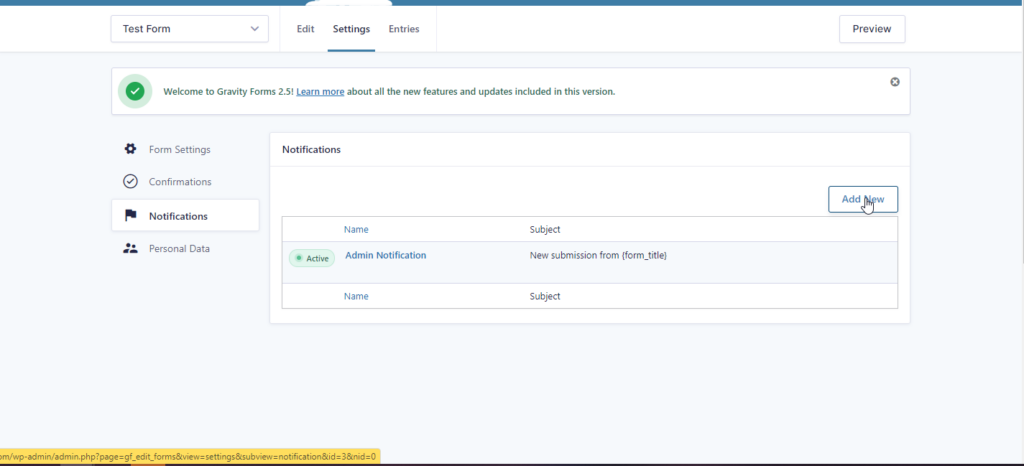
First, go to the Notifications tab in the settings menu. Click Add New and give it a name. Next, you’ll see the Send to field, so click the Select field option. In the Send to Field section, select Email from the dropdown menu. Add your name in the From Name field.
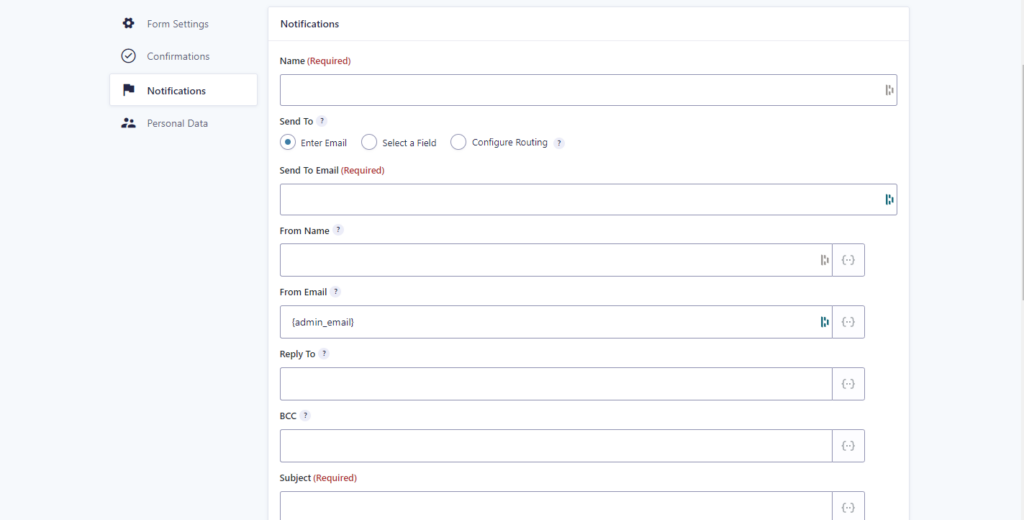
Then, add your email in the From Email field. It’s best to use an email from your domain name for a professional look.
Additionally, if anyone else in your company needs to receive the notification, you can set up the BCC field.
Lastly, don’t forget to fill the subject and message fields with the content for your notification.
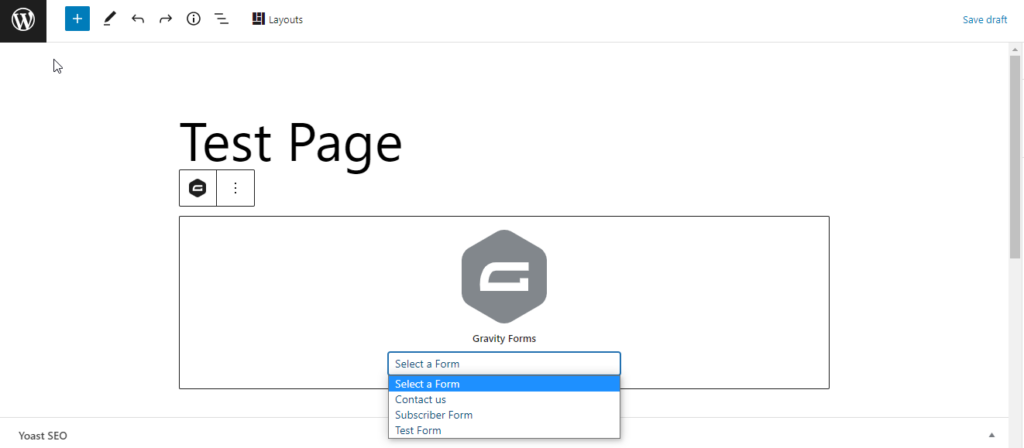
Step 5: Embed the Form on a WordPress Page
Your form will be accessible to website visitors once embedded into your WordPress site. To embed the form, go to the WordPress admin panel. Then, select the WordPress post or page where you want to place the online form.
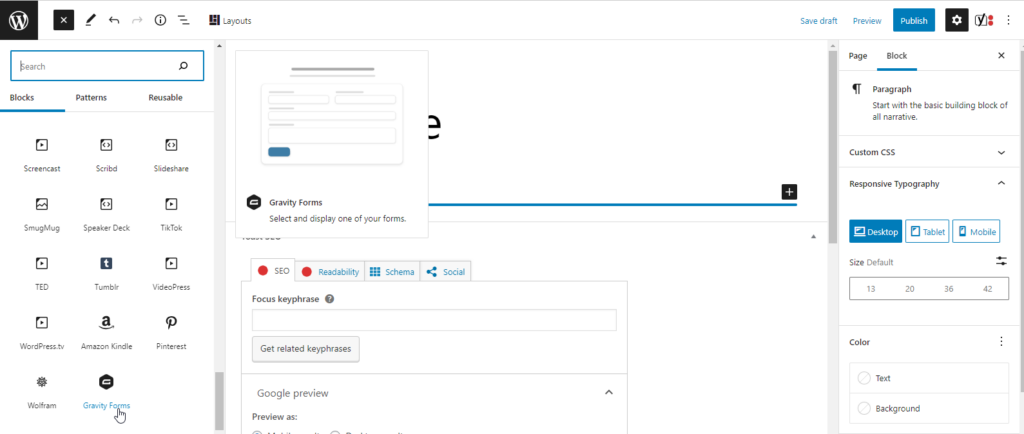
If you’re using the block editor, click the + button, go to Embeds, and search for Gravity Forms. Select the Form option to insert the Gravity Forms block. So next, go to the dropdown menu, find the appropriate form, and select it to insert it into the page.
However, if you’ve got the WP5+ block editor, you may also want to use the Shortcode block instead. Once you’ve added this shortcode block, it will accept the standard Gravity Forms shortcode.
First, note the form ID of the online form you want to add to your page. Then, click the + or Add new block wherever you want to position your shortcode. Search for your shortcode block, then add it.
Afterward, you can add the valid Gravity Forms shortcode into the block. Also, you must add the form ID in the id=X argument.
In both cases, you can save your changes afterward and preview your page to see how the form looks.
Create and Integrate WordPress Forms Into Your Pages!
WordPress website forms serve various purposes. But no matter which types of forms your web pages use, they have several advantages. For instance, they allow you to collect consistent information while protecting you from spam. They’re a time-saving solution to getting user input.
Your WordPress website can make use of the following forms:
- Contact forms;
- Lead generation forms;
- Subscription forms;
- Survey forms;
- Feedback forms;
- Order forms; and
- Registration forms.
WordPress allows developers to create forms, but you can create one yourself with the right form creation plugins. Gravity Forms is a popular choice, but whatever you choose, you can create an attractive form that improves the user journey. In addition, these forms can better your website or business in the long run.
A WordPress Developer from the Philippines knows how to add a form to WordPress pages. Count on them to help you build the ideal forms for your business website!
About Adam Tan
Adam is a charming geek who loves his family's Siberian Husky, enjoys the occasional night out with friends and, most of all, lives and breathes new trends and updates about the web and its technicalities. If you want to stay updated with changes or new trends on the web or learn about the technicalities that are involved, he's your guy. He's capable of writing cheesy stuff as well, but he'd rather stick with the manly stuff.
- Find more about me on:

About Adam Tan
-
Find more about me on:
Related News:


What Web Design and Development Has to Offer

Hackers: Who You Can and Cannot Trust

SEO Packages for Business: What You Need to Know


Comment 0