
WordPress Custom Fields & How to Create Them
Creating Custom Fields in WordPress can extend your site’s functionality, improving overall performance and delivering a smooth User Experience!
The WordPress Content Management System hosts “over 28 million live websites,” owing to its extensive functionality. One great example of its features is Custom Fields. Such fields allow site owners to add, store, and display particular types of content, mainly personalized information.
You can construct a Custom Field for a variety of unique purposes. For instance, Custom Fields can record event information, including locations and dates. They can also store information on products for eCommerce websites.
Need eCommerce Web Design and Development Services?
They’re responsible for extending the functionality of WordPress plugins and themes. In addition, they make input more manageable and improve consistency.
Overall, customized fields offer significant benefits. So, website owners should know how to add them to their WordPress websites.
Why Add Custom Fields to Your WordPress Website?
WordPress is no stranger to specialized features and functionality. For instance, you can create unique web pages and even Registration Forms with Payment Integrations. Website owners should consider incorporating Custom Fields in their WordPress websites.
There are several benefits to creating these fields.
The Benefits of Using Custom Fields on Your Site
They Create More Flexible Content.
You can go beyond your standard WordPress posts and pages with customized fields! Elevate your web pages and tailor them to your needs.
They Improve the User Experience (UX).
You can custom-tailor your fields by adding event dates, product details, and other relevant information. Thus, you can provide users with a smoother, more engaging experience.
Custom Fields Improve Data Organization.
Custom Fields can organize the content or data displayed on your site.
They Extend Your WordPress Site’s Functionality.
Customized fields allow you to add image galleries, meta information, product testimonials, and more!
They Integrate Seamlessly with WordPress Plugins and Themes.
You can improve customization to achieve the ideal website design and functionality.
Makes content future-proof and portable.
Custom Fields will keep the data intact even if you switch your website theme or change plugins.
So, all in all, Custom Fields can supercharge your business website and improve its usability. You can set up these custom fields on your own, and using a plugin will make things that much easier.
A Step-by-step Guide to Setting Up WordPress Custom Fields
WordPress has a built-in feature for creating customized fields. Firstly, you can enable Custom Fields via the classic TinyMCE editor’s Screen Options area. But if you’re using the new block editor, go to the Options section and set up your fields from there.
The most convenient way to add such fields is with plugins — WordPress has an abundance of plugins for almost any task, including Web Development. Some plugins that can help your website include the following:
- The WooCommerce plugin for eCommerce websites;
- The WPML plugin for website localization
- Rank Math Plugin for WordPress content optimization;
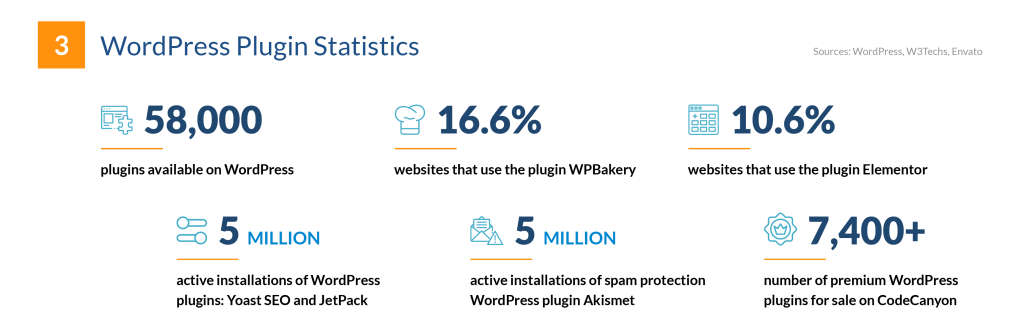
Source: FinancesOnline.
For this situation, we’ll use the Advanced Custom Fields plugin, a popular choice for simplifying Custom Field setup! So, here’s a guide to using the plugin to set up your fields:
Step 1: Install the Advanced Custom Fields Plugin
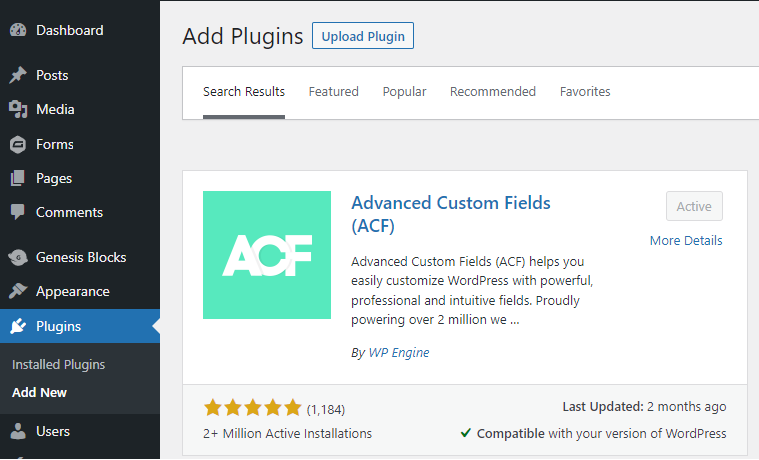
To start the process, you must have the Advanced Custom Fields plugin installed. If you don’t have the ACF plugin or its Pro version, you can find them in the plugin repository. So if you’re familiar with the installation process, you can install and activate it easily.
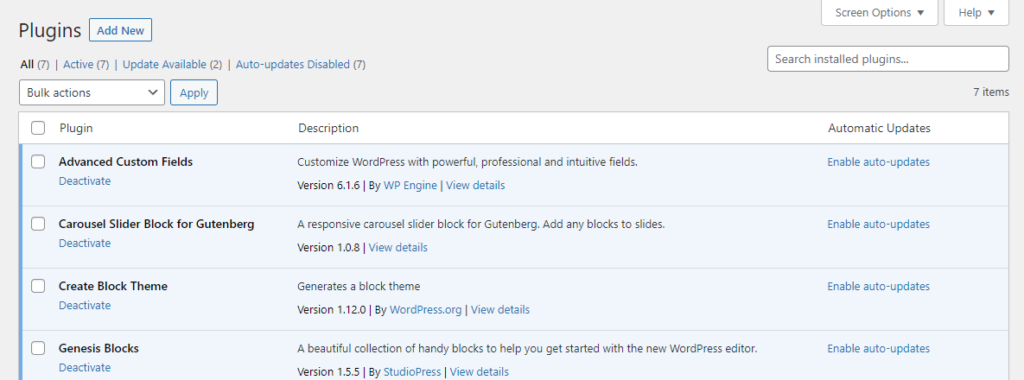
Step 2: Create Your Custom Field Group

After installing the ACF plugin, you can access the Custom Fields options. Go to the WordPress Admin panel, and find the new plugin’s Custom Fields menu. Click on it, then give the group a name and specify its location. After all, you want to be able to place the field in crucial posts or pages.
Step 3: Add the Customized Fields
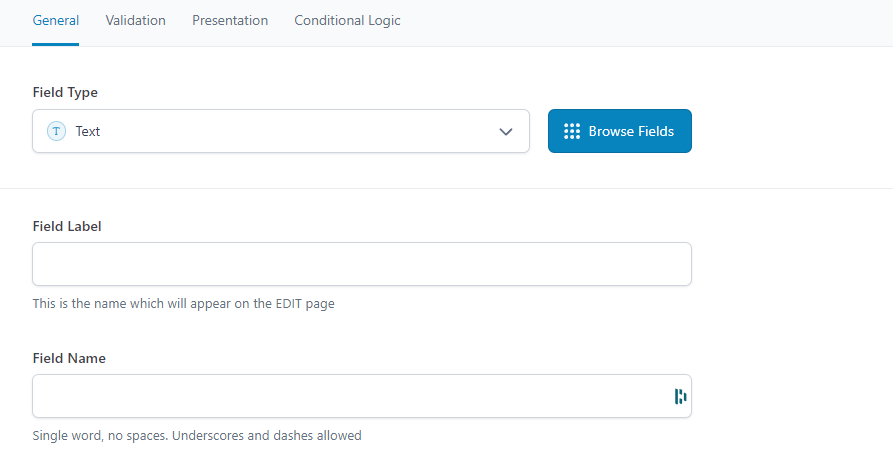
You can add individual Custom Fields by going to your field groups. So each Custom Field needs the following details:
- A label;
- A field name for retrieving the value; and
- Finally, the field type (ex., Text, image, number, or select).
For the field type, choose the appropriate one based on the content you want to include.
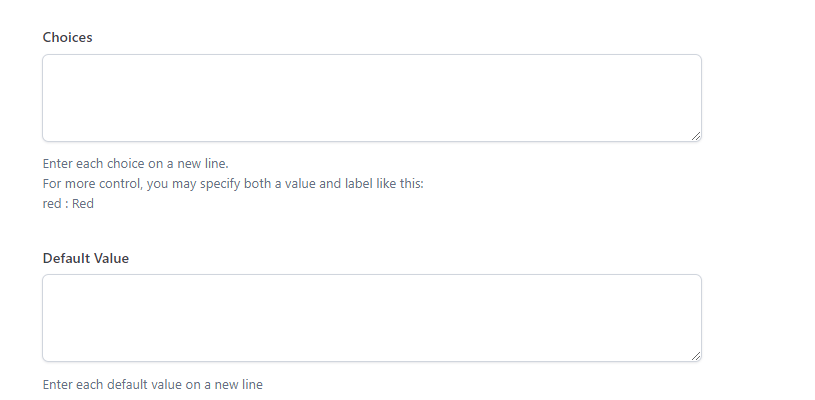
Step 4: Configure the Field Settings
While configuring your customized fields, you can work on additional settings, such as the following:
- Default values;
- Instructions; and
- Conditional logic.
These settings can enhance your fields’ behavior and appearance, giving them a personal touch.
Step 5: Display Your Custom Field Values
Once you’ve created your Custom Field, you can display their values on your WordPress website. To do this, you should open the appropriate template file where you want the field to appear, such as single.php or page.php.

Then, you can use the Advanced Custom Field plugin’s functions to retrieve and display the values. But since you’re using the ACF plugin, you can use the get_field(‘field_name’) function.
Step 6: Repeat the Process to Add More Fields
You can create more Custom Field groups to create more fields according to your website needs. That way, you can further personalize page content and enhance its functionality. Simply create more groups and repeat steps 2 to 5 for each.
Ensure that you save your changes after doing each step. Also, you should test how the fields look on your WordPress site.
Final Thoughts
Custom Fields help enhance your WordPress website’s functionality. Integrating customized fields into your pages will allow for more flexible content. Also, many Custom Fields will integrate smoothly with themes and plugins.
In addition, they offer several other benefits, including an improved User Experience, better organization of data, and future-proofed content.
Here’s a quick recap on how to create Custom Fields for a WordPress site:
- First, you need to install a WordPress plugin that can create customized fields for you.
- Next, you can start creating your Custom Fields group.
- Then it’s time to add your individual Custom Fields.
- Also, you have to configure additional field settings (ex., Default values, conditional logic, and instructions).
- After that, you can display the field values on your WordPress website.
- Repeat the process as needed to add more Custom Field groups.
- Don’t forget to save your changes after every step and test the outputs.
So, add more versatile content to your posts and pages with Custom Fields! A WordPress Developer from the Philippines can help tailor content to meet your website’s needs.
About Adam Tan
Adam is a charming geek who loves his family's Siberian Husky, enjoys the occasional night out with friends and, most of all, lives and breathes new trends and updates about the web and its technicalities. If you want to stay updated with changes or new trends on the web or learn about the technicalities that are involved, he's your guy. He's capable of writing cheesy stuff as well, but he'd rather stick with the manly stuff.
- Find more about me on:

About Adam Tan
-
Find more about me on:
Related News:


5 Benefits To Being A Digital By Default Brand

Digitally Marketing Mobile Apps: A How-To Guide


Comment 0